POSTED BY x-M-x FOR HISTORICAL PURPOSES!
Peparations:
Create your Custom folder.Requirements:
Aliens vs. Predator 2 Tools, Image editing program (such as Photoshop or Paint Shop Pro).
Options:
WinRez LT Studio 3.0Make sure you have extracted all AvP2 rez-files.
Start Dedit.exe.
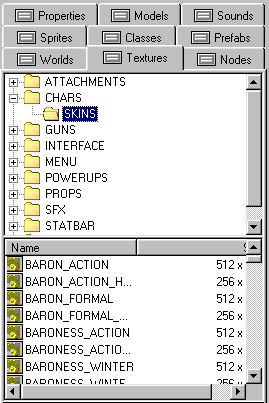
Open the AvP2 project file. Locate Skins/Characters in the Textures tab and select the skin you want to edit (.DTX).

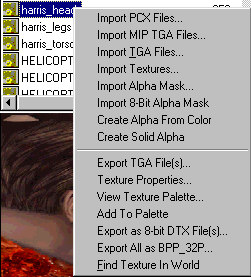
Right-click and select "Export TGA File(s)...". Answer "Yes" to any popup questions.

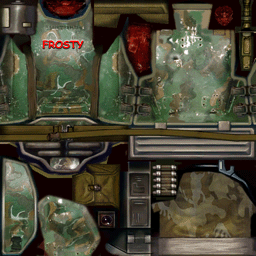
Start your image editing program and open the newly exported TGA files (they are located in the same folder as the DTX files of the skin).
Edit the skin as you see fit (this might require some skill with the chosen image editing program). We cannot offer tutorials on how to work with your particular image editing program.

© 2001 Eldritch
When you are done, go back to Dedit.exe. Locate the folder where your skin is located. Right-click and select "Import TGA Files...". Select all the TGA files you just edited. Answer "Yes" when the question about overwriting pops up.
Your TGA files will now be converted to DTX files, the texture format used in Lithtech games.
Next, use Winrez or Lithrez.
With Winrez:
Create all the necessary folders (see image). In this example I have created SKINS/CHARACTERS/MARINE/ so the DTX files I will be placing there will be recognized as a marine skin.

Import the DTX files you created back in step 8 to the correct folder (in this case, the folder called "Marine").

Save your new rez-file to your Custom folder. Name it to whatever you want (I named mine "NewHarris.rez" since it edits Harrison's skin).
With Lithrez:
Create a file structure similar to the original path to the skin somewhere on your harddrive (I created TEMP/SKINS/CHARACTERS/MARINE/ on my desktop).
Place the DTX files you created in step 8 in the correct folder (in my case, the "Marine" folder).
Open a DOS-prompt and use Lithrez to create you rez-file. The syntax is the following:
lithrez cv [name of your rez file].rez [path to the temp mod folder]
Example: lithrez cv NewHarris.rez c:\windows\desktop\temp
Move the rez-file to your Custom folder.
Start AvP2. In the startup menu (brown menu), select Options. Enter (or add) the following line to the Command-Line Parameter box:
-rez custom/[filename].rez
Replace [filename] with the name of the rez-file (in this example, it is NewHarris).
Check the box "Always specify these command-line parameters".

Start the game and check your skin in action!

NOTE: If you later decide that you do not want to use your new skin, you can simply delete the -rez custom/[filename].rez line from the options menu.
--------------
------------------------
----------------------------------
Original author AvPnews
Reposted by x-M-x - April 2014
http://www.avpunknown.com

