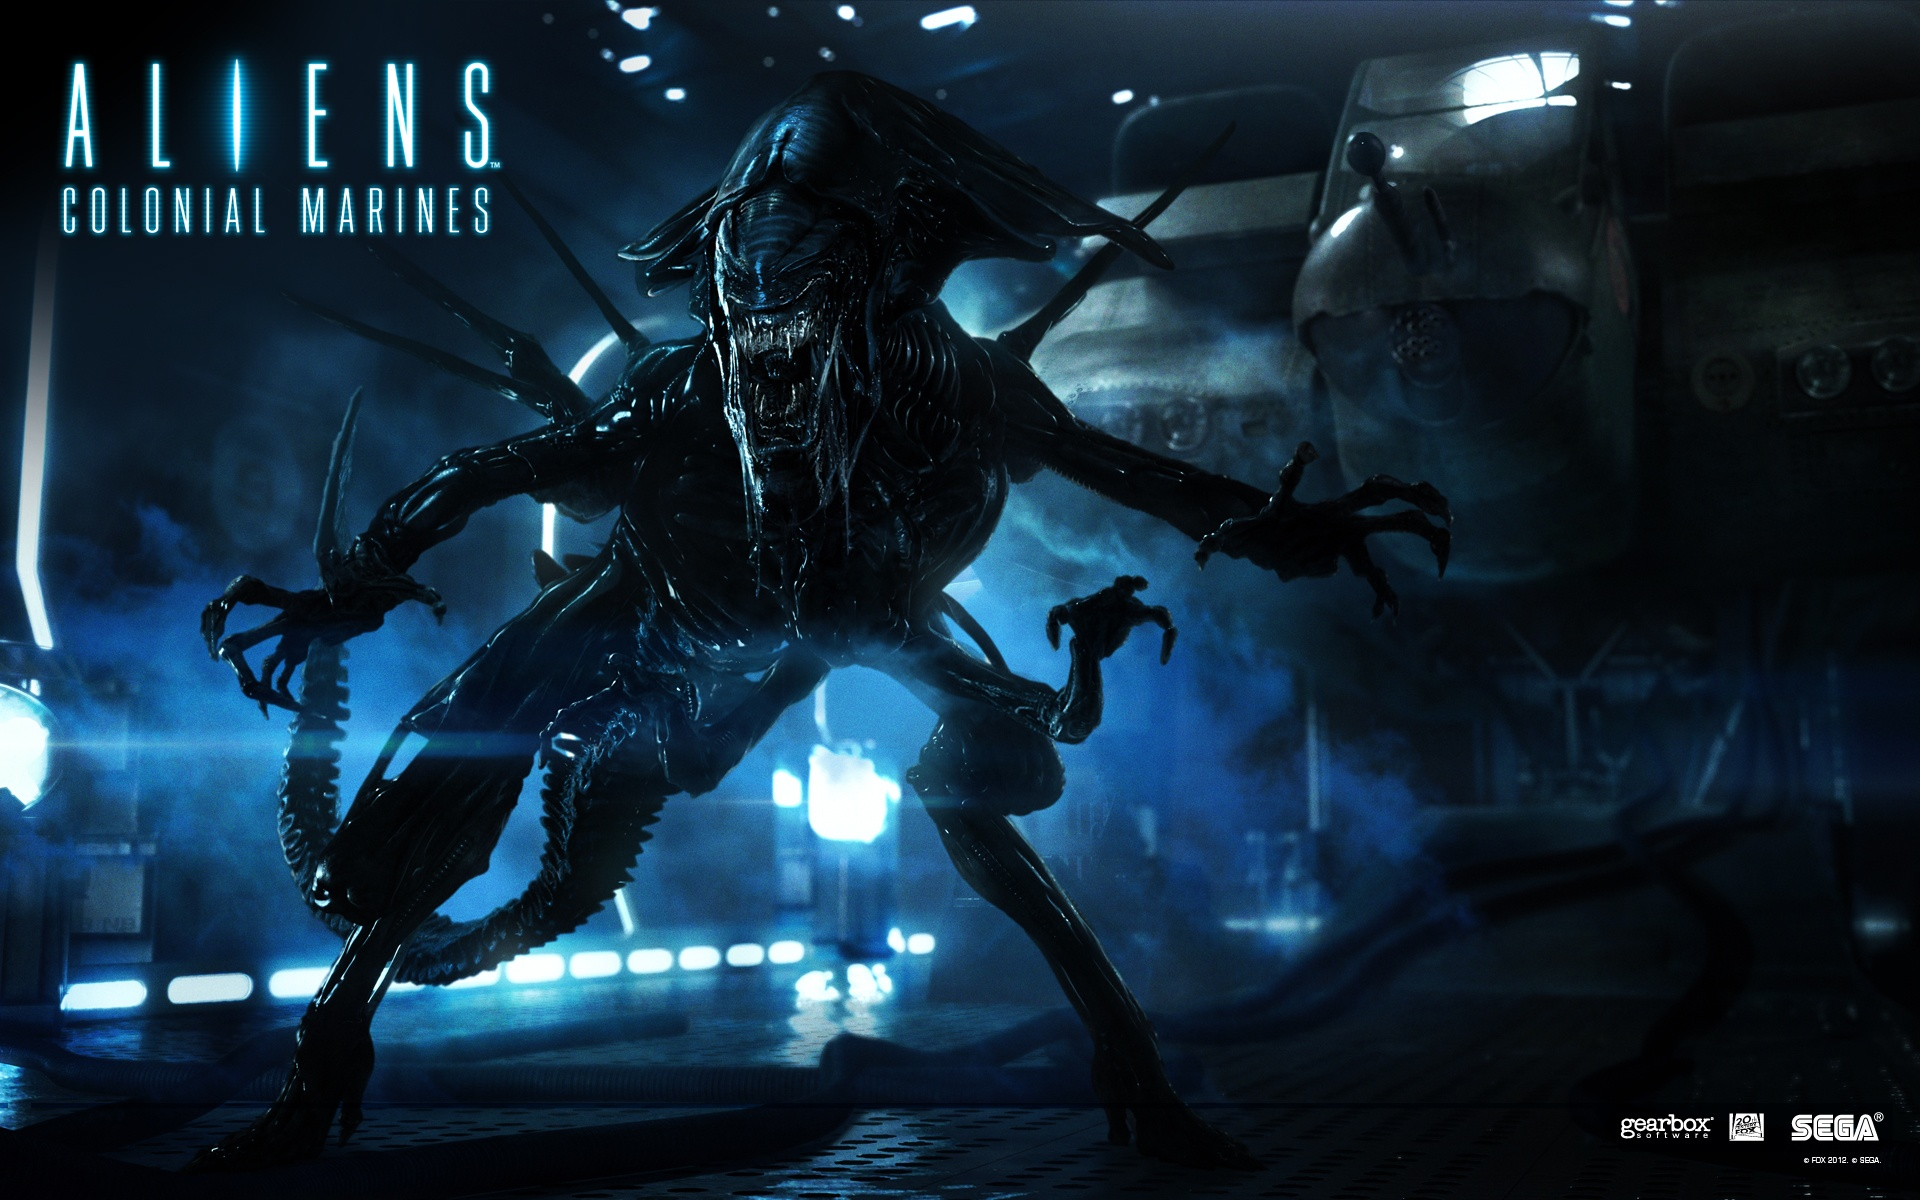

Aliens: Colonial Marines is a 2013 science-fiction first-person shooter developed by Gearbox Software and published by Sega for PlayStation 3, Windows, and Xbox 360. Set shortly after the 1986 film Aliens, it follows a squad of Colonial Marines investigating the USS Sulaco and the ruins of Hadley’s Hope on LV-426.
The game includes an 11-mission campaign playable solo or in 4-player co-op, plus competitive multiplayer with Marines vs. Aliens. Its long, troubled development and the finished game’s technical and AI issues made it notorious at release, despite some praise for the franchise atmosphere and multiplayer ideas.
The campaign is a checkpoint-driven shooter where players fight Xenomorphs and human mercenaries using classic Colonial Marine hardware—pulse rifles, shotguns, grenades, flamethrowers, smartguns, and deployable sentry turrets. Progression rewards XP for challenges and collectibles (audio logs, dog tags, and “legendary” weapons), unlocking upgrades and cosmetic options across modes.
Competitive multiplayer pits Marines (first-person, firearms) against Aliens (third-person, wall/ceiling traversal and melee/acid attacks) across several mode types, including team deathmatch and objective-driven scenarios.
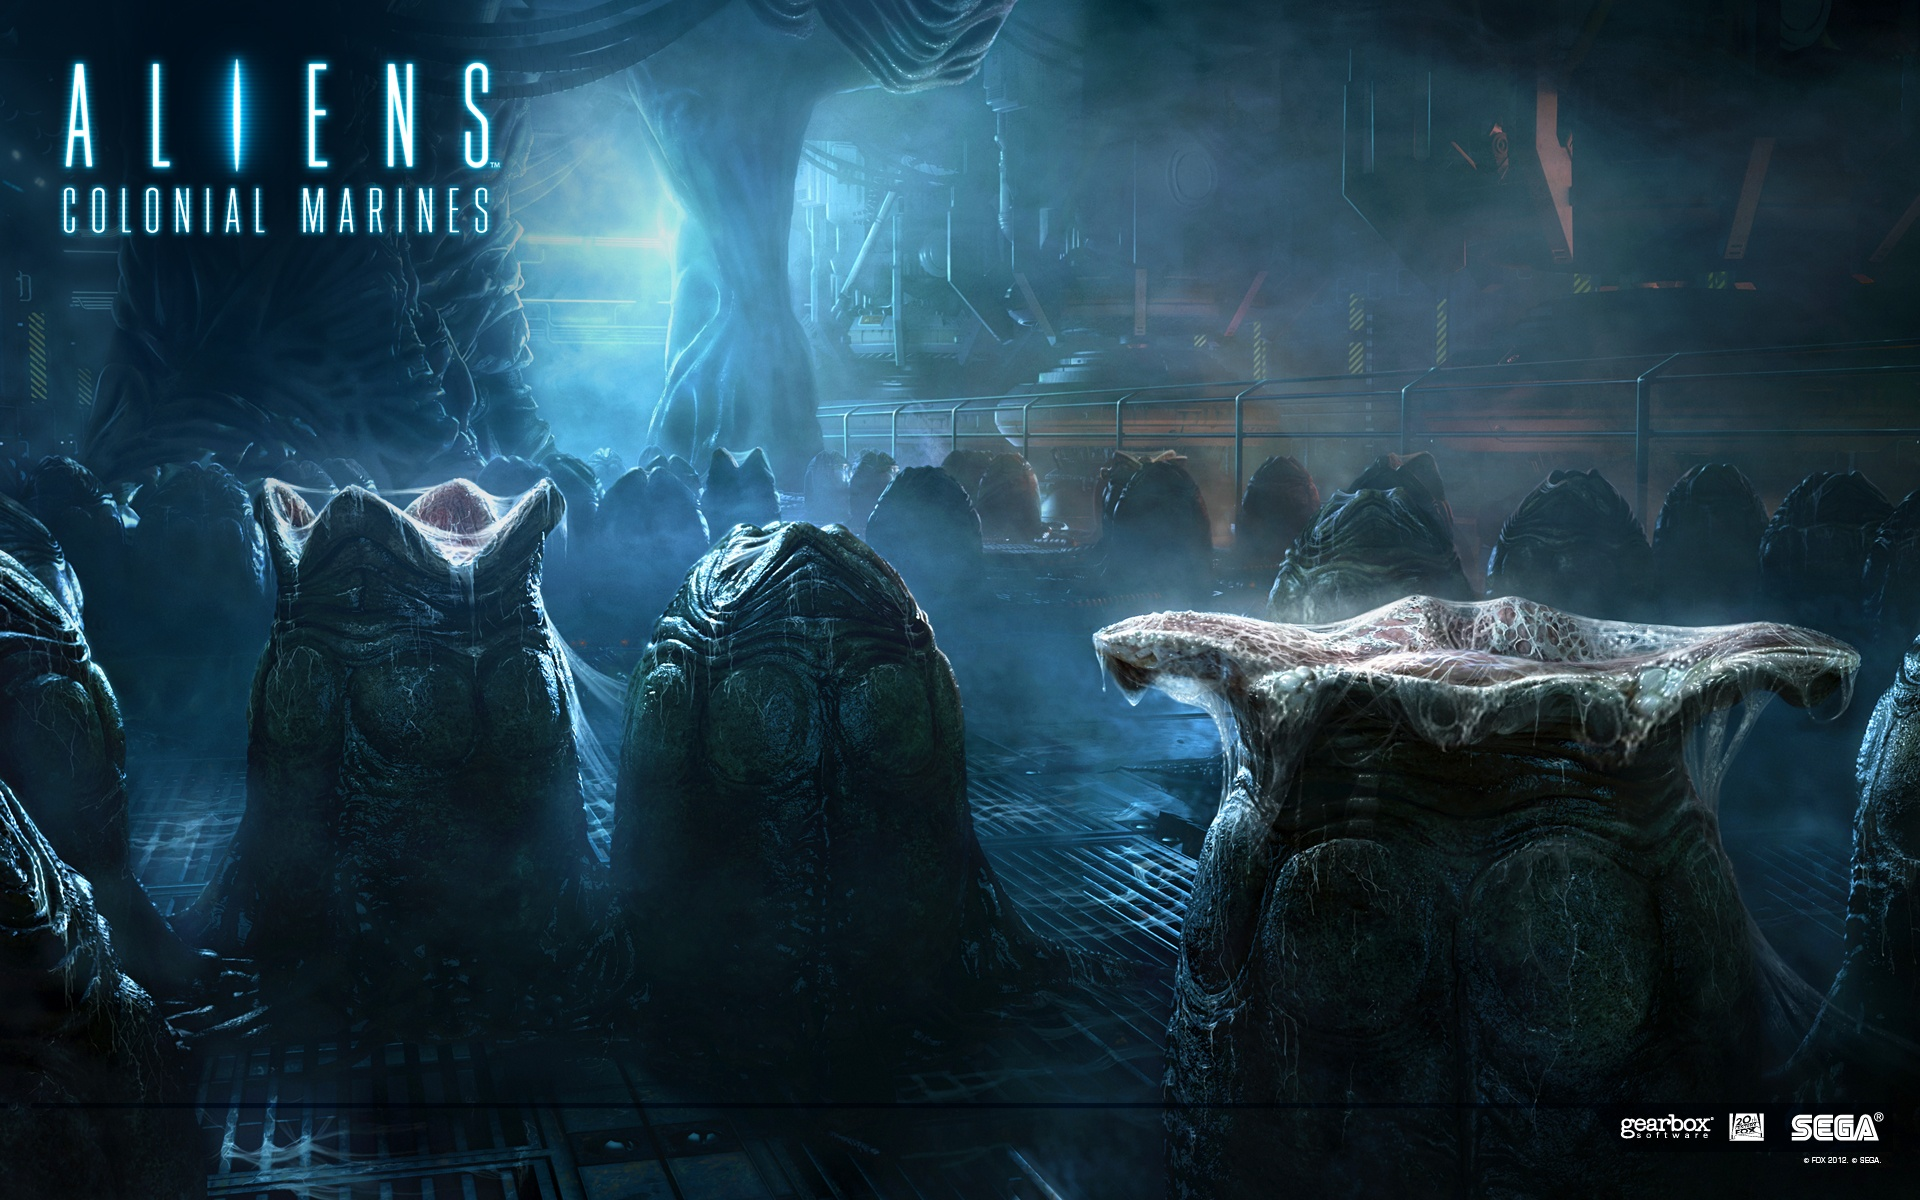
Seventeen weeks after Aliens, the USS Sephora investigates the drifting Sulaco near LV-426 and finds a widespread Xenomorph outbreak. Survivors discover Weyland‑Yutani–aligned mercenaries have taken control and are breeding Xenomorphs for study. As the situation collapses, the Marines escape to the ruins of Hadley’s Hope and push toward a nearby research facility near the derelict spacecraft, searching for a manifest tied to an unknown prisoner.
Development stretched for years and involved multiple external studios. The game was first announced publicly in 2008 and ultimately released on February 12, 2013. Post-launch patches targeted bugs and visual issues. A planned Wii U version was later canceled.
Four DLC packs released in 2013 added new modes and maps (including the co-op “Bug Hunt” horde-style mode), and a story DLC campaign (Stasis Interrupted) set before the base game’s story.
Critics widely panned the game for technical problems, weak enemy AI, and underwhelming visuals compared to pre-release demos, though multiplayer was sometimes singled out as the strongest component. The disparity between demo footage and the final release also led to a false-advertising lawsuit that later lost class-action status.
Note: Initial installation requires a one-time internet connection for Steam authentication. Required software installations (included with the game) include Steam Client, DirectX 9, Microsoft .NET Framework 4, Visual C++ Redistributable 2005/2008/2010, and AMD CPU Drivers (XP only / AMD only).
Long before the 2013 release, an earlier and separate project also carried the name Aliens: Colonial Marines. Announced in 2001 and developed by Check Six Games, the cancelled version was planned as a squad-focused shooter for consoles like the PlayStation 2 and GameCube, with players leading Marines through missions against Xenomorph threats. The game was shown publicly during development, but the build was reportedly struggling with major technical and performance issues. Electronic Arts ultimately cancelled the project in October 2002, and it never reached release. Despite sharing a title, this early-2000s game was unrelated to the later Gearbox-developed entry.
Dog tags/Audio logs/Legendary weapons locations guide
by Ultima Sonic (Daniel Munoz)
Copyright 2013


Introduction
*******************************************************************************

It's been a while since I wrote a guide, so this probably won't be the best
guide you may read. I actually thought I would never write another guide, but
after enjoying this game, I felt the need to write one. This guide is intended
to help those in need of finding the hidden dog tags, audio logs, and Legendary
weapons.

The dog tags are pretty easy to miss, since they are small and don't stick out
very well. On the other hand, audio logs and legendary weapons are much easier
to spot. Audio logs will be white laptops that glow blue, while legendary
weapons will glow a bright gold.


Mission 1: Distress
*******************************************************************************

3 Dog tags
1 Audio log
Legendary Weapon: Hicks's Shotgun


Dog tag 1: Cpl. Dwayne Hicks

After cutting down Keyes, he will open 2 doors for you. After he opens the
second door, you will enter a room where you must fight a group of Xenos. The
dog tag is in this room. As you walk into the room, follow the wall to the
right. You will see a door that's broken, but you cannot walk passed. Keep
following the wall toward the back of this room. You will see 2 crates. The dog
tag is on the crate on the left.


Audio Log: "Dr. Conrad, I'd like to -- I'd like to formally request..."

Once O'Neal becomes part of your group, you will enter a large circular room
with a spinning machine in the center. This is the gravity well. After exiting
the gravity well, you will enter a room where a single xeno will be waiting.
O'Neal will yell "Lurker!" The audio log is in this room on a table to the
right after killing the lurker.


Dog tag 2: Pfc. M. Moore

Before you enter the gravity well for the second time, it will be on a table to
the left of the doorway.


Hicks's Shotgun

Exit the gravity well, and follow the corridor up 2 stairways. After the second
stairway, enter the room, and go into the hallway on the right. Then enter the
room to the left, and you will see Hicks's shotgun lying next to an armor pick
up.


Dog tag 3: Pfc. S. Trubeskay

Make your way past the cargo bay and enter the control room. Inside the control
room, turn right, and go around those consoles in the center. The dog tag will
be on a large crate next to a tool box.


Mission 2: Battle for Sulaco
*******************************************************************************

3 Dog tags
2 Audio logs


Dog tag 1: Cpl. Cynthia Dietrich

After opening the door using the powerloader, move forward a little. You will
see 2 cryo chambers on the lying to your left. One should be open, and the
other is closed. The dog tag is on top of the closed one.


Audio log 1: "Doctor Stanton, I'm rejecting your transfer request..."

Continuing to make your way toward Bella, exit the room where you found the
first dog tag and you will enter another room where you will see several eggs
and a red tool box on top of a crate. Turn right and you will see the audio log
at the end of this room.


Dog tag 2: Sgt. Z. Forcher

Meet with Bella and then you have to cut open a door. Enter the small room that
then leads into a larger storage room. Inside the storage room, turn right and
continue toward a small flight of stairs. Right before the stairs, you should
see a corridor to the right with a streak of blood as if somebody was dragged.
Follow the streak of blood toward the end of the corridor. You will see the dog
tag on top of a green crate next to an armor pick up.


Dog tag 3: Pfc. J. Ziglar

As you make your way through the level, you will enter a room where there will
be 4 green giant tanks that have "Tank 01" written on them in letters. This
room will be heavily guarded by Weyland-Yutani soliders. Make your way up the
stairs and you will enter a console room. Inside this room, go up another short
flight of stairs and there should be a white console to your right. This
console is right next to an exit that leads into a catwalk. The dog tag is on
the console.


Audio log 2: "You're not understanding me Conrad..."

After obtaining dog tag 3, make your way through the corridors and into a room
that's guarded by Wey-Yu soldiers. You will then enter another room with a
large computer connected to countless wires in the center. You will see the
audio log in the next room as soon as you enter on the right on top of a tall,
green counter. You will reach a check point in this room, and there will be a
large window, where you can see a bridge connected to 2 large spinning turbines
that contains Wey-Yu soliders.


Mission 3: Sulaco Falls
*******************************************************************************

3 Dog tags


Dog tag 1: Pfc. Ricco Frost

From the start of the level, make your way through the deteriorating corridors,
up a flight of stairs and into a room where Bella will unlock a door. Fight
your way through these chambers, and go passed a locker room. Unlock the door
and you will fight a few more Wey-Yu soldiers. You will see a yellow flammable
canister on top of a white crate. The dog tag is on this crate. Go around to
obtain it.


Dog tag 2: Pfc. E. Greenlief

Right after the room with the 2 giant spheres, you will enter a broken stairway
that's falling apart as you enter. Carefully make your way down the broken
platforms to the lower level, making sure you don't drop instantly to the
bottom level. The dog tag will be on a ledge with an armor pick up.


Dog tag 3: Cpl. T. Ashley

Once the elevator stops (the one you used to reach the cargo hangar), facing
the elevator control, there will be a large crate to your right. The final dog
tag is right behind this crate.


Mission 4: No Hope in Hadley's
*******************************************************************************

4 Dog tags
1 Audio log
Legendary weapon: Gorman's Pistol


Audio log: "Mom, it's Ann. I know I said I wouldn't ask for more..."

This level's only audio log can be found as soon as you enter Hadley's Hope.
Follow the long corridor and enter the first room to the left. The audio log
is on a table to the right, next to a window that looks back into the corridor.


Dog tag 1: Lt. B. Norton

As soon as you cut open the door that leads into the operations room, enter the
room and look to your left. You will see a white table behind some glass. The
dog tag is on that table.


Dog tag 2: Pfc. Trevor Wiersbowski

When you receive your orders to place the motion sensors, follow O'Neal, Bella,
and Reid. After O'Neal opens the door, proceed through a small room where you
have to place a motion tracker, and head into a much larger room with a spot to
place another motion tracker. Turn right inside this larger room and enter
another small room to your right. You'll see the dog tag on top of a gurney.


Dog tag 3: Pfc. Jenette Vasquez

After obtaining the smart gun and making your way to the bottom level, follow
the long tunnel. Fight through several xenos that will come your way from the
other end of the tunnel. There should be a room that will be on the left hand
side of this long tunnel. Enter this room, fight one more xeno, and then look
for the dog tag on top of a box that's agains the wall.


Dog tag 4: Pfc. M. Macaulay

As the straight tunnel comes to an end, continue to fight through the wave of
xenos. You will see an armor pick up next to a corridor to the left. Take this
corridor, and when it ends, drop down onto the debris and some pipes.
Immediately turn around and look down. You will see the dog tag on top of the
debris.


Gorman's Pistol

Can't possibly be missed. Enter a large room that has a door that needs to be
cut open. The pisol is on a green table in this room.


Mission 5: The Raven
*******************************************************************************

3 Dog tags
Legendary weapon: Hudson's Pulse Rifle


Hudson's Pulse Rifle

Meet with O'Neal and get your gear back. After he unlocks the door, head
straight and go into that small room directly ahead of you. The rifle is on the
corner to the right as soon as you enter.


Dog tag 1: Lt. William Gorman

Once you make it outside and fight off the xenos, facing the same direction
that you were facing when you came outside, go left and you will find a large
shipping container (if you use your motion tracker, it should be northwest of
the exit that brought you here). There's a fallen antenna that you can use to
climb up onto the container. You will find the dog tag right on the "W" that's
painted on the container.


Dog tag 2: Cpl. C. Bradley

Once the raven xenomorph starts chasing after Bella and Reid and you need to
make your way toward them, head through the new path that opens up, fighting
off the xenos as they come. As you go around the large metal boards on your
right, you will see a door with 2 red lights on each side. Look down directly
in front of this door to find this dog tag.


Dog tag 3: Pfc. M. Jelley

Enter the building and cut through a door. You will enter a large hangar. Look
for the stairway that takes you up. Right behind the stairway is a cardboard
box. Behind the box is the dog tag.


Mission 6: For Bella
*******************************************************************************

3 Dog tags
3 Audio logs
Legendary weapon: Vasquez's Smart Gun


Dog tag 1: Cpl. M. Bailey

A little after you see all the bloody corpses on the ground, a dropship shoots
a giant piece of the Sephora. You will see an ammo pick up for the assault
rifle. To the right of the ammo is a metal board full of blood and the dog tag.


Dog tag 2: Pfc. J. Washenfelder

In the part where the xenos start attaking, you will pass through a piece of
the Sephora. On the other side, you will come across another part of the
Sephora that looks like it could it be from the engine. Next to it is a yellow
container that holds the dog tag. It's located right before what resembles
the entrance to a cave. If you reach a small rock slide, you've gone too far.


Audio log 1: "This is formal supply requisition order..."

Enter the ship and fight through the xenos. You will then exit one part of the
ship, fight off some more xenos, and then enter another part of the ship.
Inside this second part, you will fight a few more xenos, and then drop down to
some broken down catwalks. Turn around and you will find the audio log againts
the corner, close to an armor pick up.


Audio log 2: "Beginning my weekly update on the construction..."

Disable the first auto turret you encounter. As you disable it, you will see
the audio log on top of a yellow crate in this same room.


Audio log 3: "-- Message repeats. We are abandoning the research..."

You will encounter 2 more turrets. The second one is in a large room (where
Winter will decide to go off by himself to deactivate it) and the third one is
in a corridor to the right just passed the second turret. Opposite of the
corridor with the third turret is another corridor. Go down this corridor and
cut open the door at the end. You will see the audio log straight ahead right
next to some armor.


Dog tag 3: Pfc. Daniel Spunkmeyer

This last dog tag will be right on the console that O'Neal hacks.


Vasquez's Smart Gun.

After O'Neal hacks the console, you will go outside and fight some Wey-Yu
soldiers. Then you will go back inside another builing and down some stairs.
On the lower level, go through the door, but don't turn right where Bella and
and O'Neal went. Instead continue to go straight and you will see the gun on
the left on top of some pallets. One of the pallets will be blocking it from
view, so you may not see it as you enter the room.


Mission 7: One Bullet
*******************************************************************************

3 Dog tags
3 Audio logs


Dog tag 1: Sgt. Al Apone

Sneak passed the first search light and make your way through the cave. When
you exit the cave, you will see another search light and a truck in an opening
to the right. Go through this opening and the dog tag will be on the left on
top of a crate next to an armor pick up.


Dog tag 2: Pfc. K. Barrington

After the cutscene, go up the stairs in the next room and follow the walkway.
You will have to press the button on the wall to cancel the neurotoxin release.
After pressing the button, turn right and head toward the console. The dog tag
is on the console.


Audio log 1: "What follows are my notes on..."

After getting dog tag 2, turn around and enter the room (be careful of the
enemies). Immediately turn left and you will see the audio log againts the
corner on a white table.


Audio log 2: "Autopsy report for Doctor David Hale..."

After going downstairs and O'Neal warns you about the enemies being scientists,
not soldiers, fight through a few enemies and make your way through a white
hallway. When you reach the end of the hallway, you must enter a room to the
right. Look right and you will see the audio log on the edge of an operating
table.


Audio log 3: "This is foreman Morris, submitting a formal requisition for..."

Go inside the building after dropping the load on the APC using the crane and
head left. When you enter the second room, you will see a smaller room directly
to your left. Enter it and inside is the audio log.


Dog tag 3: Cpl. C. Nelson

Go downstairs when O'Neal tells you to disable the 3 power cells. As soon as
you get off the stairs, look down and to the right and you will see a closed
cardboard box. Behind it is an open carboard box which contains this dog tag.


Mission 8: Rampart
*******************************************************************************

3 Dog tags
2 Audio logs


Audio log 1: "Preliminary attempts to develop a living Xenomorph Queen..."

From the starting point, move forward and turn in to the room on the left. On
the opposite corner of this room are 2 doors. Take the door on the right into
a small office and you will see the audio log on a white table to the right.


Dog tag 1: Pfc. Tim Crowe

After going outside and fighting through the Wey-Yu soliders and xenos, you
will come across 3 small buildings. Enter the third building (its entrance is
just after some spiked barricades) and look to the left. The dog tag is on top
of a brown crate right next to an armor pick up.


Audio log 2: "Quick status update on the derelict ship..."

Enter the giant structure and go passed the short tunnels. You will come across
some catwalks that will take you across to the other side. Look to the right
and you will see a small building. Make your way around to this building and
you will find the audio log on the right on top of a white table.


Dog tag 2: Cpl. S. Boroski

After making your way across, taking the elevator up to the upper level, and
passing through some more tunnels, you will enter a room with a giant alien
looking "gun." Approach the alien gun, but turn left and go up the small
stairs. Keep following the rail to your right, and you will find the dog tag
on a short walkway that sticks out toward the alien gun.


Dog tag 3: Pfc. D. Copes

Once you are outside again, go forward a little and there will be a path to
your left that goes up hill. At the top of this path will be a greenish-yellow
truck on the left. You will find the dog tag on top of a crate behind this
truck.


Mission 9: Hope in Hadley's
*******************************************************************************

4 Dog tags
Legendary Weapon: Vasquez's Pistol


Vasquez's Pistol

As soon as Cruz opens the door to Hadley's Hope, enter and take that hallway to
the left. Enter the room that's on the left and you will find the weapon behind
some boxes.


Dog tag 1: Pfc. Mark Drake

In the large adjacent room from the small room where you rescued C. Duplis,
look for the dog tag on a long table, right next to a microscope.


Dog tag 2: Lt. P. Watkins

When you are defending in the vehicle bay, look for some stairs that take you
down into a basement (they should be right in front of the room where you can
refill your ammo). Follow this corridor and you will eventually see the dog tag
lying on the floor.


Dog tag 3: Pfc. D. Rechner

After the battle outside with the giant xeno, enter the building and follow the
corridor to the end. Enter the dark room on the right and you will see the dog
tag on a green table next to some ammo.


Dog tag 4: Sgt. R. Siwiak

When you make it to the drop pad, turn left. Toward the right of the stairs you
will see a bunch of containers. You will find the dog tag on top of one.


Mission 10: Derelict Reclaimed
*******************************************************************************

3 Dog tags
Legendary Weapon: Frost's Flamethrower


Dog tag 1: Pfc. J. Ma

After the second set of tunnels and entering the room with the alien gun,
continue to make your way around the gun. When you see a one of those hazmat
people stuck to a pillar of infestation in the middle of the walk way, look to
the right and you will see a green Wey-Yu crate holding the dog tag.


Dog tag 2: Pfc. K. Morales

On your way to destroy the second AA gun, you will come to a large open area
with fellow marines defending around a forklift. Behind the forklift, you will
find the dog tag on the ground.


Frost's Flamethrower

This one is easy. You can find it inside the same shipping container where you
find the RPG that you need to shoot down the third AA gun.


Dog tag 3: Cpt. Colett Ferro

When you reach the fallen dropship, walk straight toward it. This dog tag will
be lying on the floor between the 2 marines (Ruiz and Dags).


Mission 11: Home
*******************************************************************************

3 Dog tags


Dog tag 1: Cpl. L. Papp

From the starting point, turn about a 90 degree angle to the left. You will see
some stacked crates in front of a "W" that's painted on the floor. To the right
these stacked crates are smaller crates, one that holds the dog tag.


Dog tag 2: Pfc. A. Montgomery

From the location of dog tag 1, turn around and you should see a forklift next
to a large yellow shipping crate. Run behind them and you will find the dog tag
on top of a grey box in a dark corner.


Dog tag 3: Pfc. William Hudson

This final dog tag will be to the left of the crashed dropship. You have to go
around the ship. The dog tag will be between the ship and the wall on the floor
surrounded by debris, making it difficult to spot.


Closing
*******************************************************************************
I give anyone reading this guide permission to post it on their website. Just
please, I ask, give credit where credit is due.

I would like to thank Gearbox and Sega for this awesome game.

I would also like to thank Gamefaqs for allowing me to post this guide.

And most importantly, I would like to thank you for reading this guide.

I will be more than happy to answer anyone's questions. You can always email me
at super_xero17@yahoo.com. With that being said, I hope this guide has been
helpful to you.
The long in-development Aliens: Colonial Marines has finally released courtesy
of Gearbox! This latest entry in the long-running Aliens franchise aims to show
fans what happened weeks after the events of the goundbreaking science-fiction
classic film Aliens!

Aliens: Colonial Marines
Written by Dalton "HorrorSpooky" Cooper
Copyright 2013

Contact Information
E-mai: horror_spooky@hotmail.com

Legal Information
- – – – – – – – -
This may not be reproduced under any circumstances except for personal, private
use. It may not be placed on any web site or otherwise distributed publicly
without advance written permission. Use of this guide on any other web site or
as a part of any public display is strictly prohibited, and a violation of
copyright.

All trademarks and copyrights contained in this document are owned by their
respective trademark and copyright holders.

===================
=TABLE OF CONTENTS=
===================
1. Introduction and Controls
2. Campaign
   Mission 1: Distress
   Mission 2: Battle for Sulaco
   Mission 3: Sulaco Falls
   Mission 4: No Hope in Hadley's
   Mission 5: The Raven
   Mission 6: For Bella
   Mission 7: One Bullet
   Mission 8: Rampart
   Mission 9: Hope in Hadley's
   Mission 10: Derelict Reclaimed
   Mission 11: Home
3. Versus
   Maps
   Team Deathmatch
   Extermination
   Escape
   Survivor
4. Arsenal Upgrade
5. Service Record
6. Conclusion

- - - - - - - - - - - - - - - - - - - - - - - - - - - - - - - - - - - - - - - -
1. Introduction and Controls
- - - - - - - - - - - - - - - - - - - - - - - - - - - - - - - - - - - - - - - -
Taking place weeks after the events of the blockbuster film Aliens, a group of
colonial marines investigate what exactly happened to the mining colony that
was terrorized by Xenomorphs!

<---Marine Controls--->
Left Stick - Move/Strafe/Sprint
Right Stick - Turn/Look
A - Jump
B - Crouch
RT - Primary Fire
RB - Secondary Fire
Right Stick (click) - Melee
LT - Zoom
X - Use/Reload
LB - Motion Tracker
Y - Next Weapon
D-pad (right) - Equip Sidearm Weapon
D-pad (left) - Equip Tactical
D-pad (down) - Flashlight
D-pad (up) - Taunt

<---Xenomorph Controls--->
Left Stick - Move/Strafe/Sprint
Right Stick - Turn/Look
A - Jump
LT - Wall Climb
X - Use
RT - Primary Attack
RB - Secondary Attack
LB - Use Ability
Y - Aimed Leap
B - Fatality

<---Other Controls--->
Start - Pause
Back - Scoreboard

Now you're ready to FIGHT THE FEAR.

- - - - - - - - - - - - - - - - - - - - - - - - - - - - - - - - - - - - - - - -
2. Campaign
- - - - - - - - - - - - - - - - - - - - - - - - - - - - - - - - - - - - - - - -

===================
MISSION 1: DISTRESS
===================
Following the scenes, you will be in control of Winter. He'll show off his
gun and then you'll be able to move out of this room. Go through the only door
and start walking through the space-tube. A body will smash on top of it, but
ignore that and keep moving forward to the door at the other end. Press X to
enter, and then hang tight in the airlock.

The subsequent door will open up eventually, allowing passage. You'll find
your fellow marines scrambling to save the lives of a few injured marines on
the ground. They ask you to use your motion tracker, so do that now. To equip
it, press LB and start moving it around.

There will be three human blips nearby, but also a circular, unknown blip. Exit
this room to reach a large hangar area. Half of a synthetic (the non-talking
half) will be noted by Winter. Go to the door on the right and press X to use
your torch to cut it open. This will be completed when a meter is filled after
a certain amount of time has passed.

The next room is covered with icky stuff. As you explore the area, you'll
notice three eggs on the ground as well as a camera that's set up. Take a
right from the camera and you'll find body armor on the ground. Pick it up,
and then go straight down the hall to find Keyes attached to the wall. Press X
to start cutting him down.

A Xenomorph will ruin this and attack, knocking Winter to the ground. Complete
the QTE by mashing on the X button, and the Xenomorph will run away. Let
Winter to stand up and then pursue the Xenomorph using the motion tracker. Find
it, shoot it a bunch, and then when it's dead, return to Keyes. Finish cutting
him down.

Following the subsequent conversations, Winter will decide to help Keyes.
Follow him through the next door and continue following him to the next room,
where more Xenomorphs will attack. Get your back to a wall and just kill them
as they come. Continue following Keyes and he'll lead you to stairs. Follow
them up and then go through the next door with him. Retrieve the data log from
the center console, and then Keyes should take care of the Xenomorph that
attacks. Wait for Keyes to finish with the door in here and then follow him
through.

Down the next hallway, a Xenomorph will burst through the glass. Kill it and
keep following Keyes from room to room, killing the Xenos as they show up.
There will be a lot of Xenos that show up, and their acidic blood can burn
away any body armor you have and also do a lot of damage, so try to keep your
distance. If they get too close, click in the right stick to do a melee attack,
but be ready to back up quickly to avoid taking acidic damage. Keep following
Keyes until you reach a larger room with ammo and armor on the ground. Gather
these supplies while Keyes messes with the door.

Keyes will get the door open, and then idiotically toss a grenade at the ship,
causing an explosion that leaves the doors locked down. Run over to O'Neal, the
marine behind the makeshift barricade, and gather the supplies. There should
be more armor and ammo, plus a med pack sitting on the crate if you need it.

Get your back to the hangar doors and get ready. The Xenos will come in a
constant wave. Keep firing at them until the hangar doors open. You should
have plenty of ammo. Your secondary fire by pressing RB will shoot grenades,
so use that if the situation gets hairy, but be careful about shooting grenades
too close, or else you'll die in the blast as well.

When the hangar doors open, retreat inside. Follow Keyes through the umbilical,
but some chest-exploding things will happen. What follows is a scene that
almost feels like a QTE, but don't worry about pressing any buttons. Return
to the previous ship and sit tight as O'Neal and Winter give a status report
on the situation to Cruz.

Go through the vent in the floor. Then go through the next door. Let the
stabilization process occur, and then continue into the next room and check
out the lab equipment. Move through the next room, follow O'Neal around the
gunk, and then continue to kill the Xenos as they show up. Keep an eye out for
supplies. There are plenty of med packs lying around these next few areas of
the game.

You'll reach a larger room with a circular catwalk. Follow O'Neal around. Be
careful of the Xenos, as they will be much more active here. Kill them as they
come and then keep following O'Neal from door to door. You'll reach the upper
level of this area. Kill the Xenos and follow O'Neal to the end through the
next door. He'll start opening it, and will need you to protect him while he
does so.

Fight off the Xenos until O'Neal can get the door open, then go through to
escape. From here, go right and through the next door. You'll find armor as
well as Hicks's Shotgun, which is a Legendary Weapon and will automatically
replace your current shotgun. When that's done with, return to the center room
and go the way opposite of the Legendary Weapon.

You'll be in the Cargo Bay Area. Follow O'Neal to the stairs. Kill any Xenos
that get in the way, but try to avoid as many as possible. Follow O'Neal to the
cargo bay controls and then activate the controls. Hang tight as the Xenos are
sucked into the vacuum of space.

============================
MISSION 2: BATTLE FOR SULACO
============================
Grab the ammo from the center area and then take cover by pressing B. A couple
of enemies will enter the control room through a nearby door. Pop out of cover
to kill them one at a time. Take whatever they drop and then proceed with
caution into the next room. Take a right and go through the corridor. Shoot
the enemies through the window.

Then continue to the next set of rooms. Avoid the middle area as you'll be
left exposed. Go all the way to the end and you should be able to flank the
next few enemies that come out of the next area that you need to go through.
Loot their dead bodies and then follow O'Neal down the stairs. A health pack
will be on the counter if needed.

A soldier will shut the door on you and O'Neal in the next area. Take control
of the Powerloader by pressing X. Use RT to control its right arm and use LT
to control its left arm. Go over to the hangar doors and press RT to rip the
hangar doors open.

Follow O'Neal into the next room, and you'll find a bunch of Facehugger eggs.
Shoot the eggs to avoid being attacked by Facehuggers. If one does attack you,
mash on the indicated button to avoid being killed by it. Destroy the eggs as
you move through this area, and kill any Facehuggers that are crawling around
outside their eggs as well. Keep an eye out for ammo and the like as you
follow O'Neal.

You'll be in a larger room with more eggs and a door that is electronically
locked. You'll find the keypad on the wall, though not nearby. Interact with
the keypad and it will unlock. Destroy the eggs, then move into the next hall
and continue following O'Neal. He'll lead you to a storage room area. Cut
through the door and O'Neal will be reunited with Bella. After their reunion,
cut open the next door for them.

Keep following Bella and O'Neal until you reach a long hallway-like area with
vehicles in the center. More soldiers will start showing up. Get behind cover
and kill them. IF you hang a right, you can get on an elevated position. Kill
the enemies here and then use your elevated position to flank the enemies
below. Be sure to loot the mercenaries as they drop goodies such as health
packs and armor. Push your way forward until the large hangar doors at the end
open.

A heavy enemy will show up. Get behind cover and fire grenades at him until he
dies. He'll drop a full body armor, so pick it up and then continue through the
next doors. You'll come to a door that you can't open until O'Neal and Bella
are near you, so wait for them to catch up. Then as soon as the door opens,
kill the mercenary here and then sprint to the right.

Bella and O'Neal will go left and fight the mercenaries there. Through the
railing, you can shoot a few mercenaries on the other side. Then regroup with
Bella and O'Neal and finish off the enemies that they didn't kill and follow
them. Call the elevator once you reach it and then ride in it.

At the top, kill your way through the enemies and then at the next door, turn
around. You'll find fully body armor hidden behind a crate. Grab it and then
start pushing forward through the next wave of enemies up ahead. If you start
to take too much damage, hang back and let O'Neal and Bella take care of
matters for you for a little bit.

Then push through the next area of enemies. You'll move through tight
corridors, so be ready to take out the mercenaries as they show up. You'll
then open up to another long corridor. Kill them from afar, and then a heavy
enemy will show up. Throw a few grenades down the corridor and when you run
out, start firing at him with all you've got until he goes down. Run down the
corridor and loot everyone.

In the next room, crouch. Kill the mercenaries and then work your way to the
control panel that they were messing with. Stay crouched to avoid taking fire
from the mercs outside. Interact with the control panel to get the door open
and then follow O'Neal and Bella through the corridors to reach the next
elevator.

The next elevator will open up into a sort of school-like area. Two enemies
will be at the bottom. Kill them quickly and then run down there. In the next
set of halls, there will be turrets set up. At the bottom of the school-like
area, you can go to the left or you can go to the right. Go to the right. Stay
crouched and kill the enemies as they come. You'll be able to flank one of the
turrets from here easily. Press X to deactivate the turret when you get near
it. Now keep following the halls and you'll reach another turret to disable.
Move behind it quickly, disable it, and then everyone can move on to the
weapon control room.

In here, immediately get behind cover. Move up, but do it slowly. There is a
turret at the top of this area, so you will need to flank it. Going to the
left or to the right will yield identical results. Enemies will stay behind
cover mostly in this area, so utilize any grenades that you have. Get as close
to the turret as possible before disabling it. Clear the area of enemies and
then turn off the weapon system.

=======================
MISSION 3: SULACO FALLS
=======================
Backtrack from the control room. Just sprint and follow your partners. There
will be mercenaries as you move through the areas, so take cover and take them
out before proceeding. You'll reach a hall with the air being sucked out
through a partially opened door, so shoot the canister keeping the door open
for safe passage.

Loot the rooms thoroughly as well as the items dropped by the mercs. You'll
reach an elevator. Get inside and use it. Then run through the next few rooms.
Xenos will start attacking the mercs. You can stay behind cover and let the
Xenos kill all the mercs if you want, and then start clearing them out, as the
Xenomorphs are much easier to kill than the mercenaries.

Whatever you choose, start pushing forward. The walkway will give out and
you will fall in the water below. Xenos will come out of the vents on the
ground. Kill them and then rush to the lift and ride it up. Then resume pushing
forward to the next room. Go to the control panel and interact with it in order
to "run a bypass", as the mission objective states.

Continue, grabbing the body armor and ammo in each room, and kill the Xenos as
well. The area will open up into a long hallway, in which there will be many
more Xenomorphs to deal with, plus a couple of mercs. The Xenos will make quick
work of the mercs, so take out the rest of the Xenomorphs and continue through,
where you will find an elevator. Wait for the elevator to show up, then get on
and activate it.

Push forward to the next major area, where you will reunite with Cruz. Kill
the mercs as they show up, but stay behind cover. Sprint to the first release
lock and arm it by using the computer. Then as you make your way to the second
computer, the catwalk will be destroyed.

Stay crouched and slowly backtrack. There is a center room with the controls to
the crane that you need to make yourself a bridge to the next console. A heavy
will be guarding it. From up on the catwalk, kill him and all the enemies
below. Go to the controls and use them. Then sprint back to the destroyed
area of the catwalk. Use the container the crane brings up and sprint to the
next console. Activate it.

==============================
MISSION 4: NO HOPE IN HADLEY'S
==============================
Upon landing at Hadley's Hope, chill out for a while so everyone can get a
grasp on the situation. Then start walking to the mining colony proper in which
the bulk of the film Aliens took place. Fans of the movie will see memorable
sites. Keep going until you reach an area that Cruz says is the new HQ for
this operation.

Pull the lever on the wall to get the power going. Then stand with Cruz as he
debriefs everyone. Follow O'Neal through the next sequence of rooms and
corridors. There are panels on the wall that you have to place motion trackers
on so everyone can know where the Xenomorpsh are at all times. The fifth
motion tracker you place will malfunction. Fix it, and then a bunch of Xenos
will start appearing in the area.

Fight your way back to HQ. At HQ, there will be more Xenos to kill. Wipe them
out, and then Cruz asks you to go back and get the turret. Backtrack to the
hallway with turrets. Pick up the designated one with X and then take it back
to HQ. Lay it by the ammo cache by holding RT. Then another wave of Xenos will
attack.

The safest place here will be by Bishop. Hang out by him and kill the Xenos
when they get close to you. If you need to restock on ammo, there is ammo by
the turret, remember. When all the Xenos are dead this time, wait for Cruz to
give you new orders.

You now have to make your way to the comm tower to check on Bella. You and
O'Neal will be given Smart Guns. Grab it and then follow O'Neal into the next
room. The partially ajar door will be fully opened. Move through the hall and
then fall through the hole in the floor.

The Smart Gun will come in handy for this area. The gun will automatically
aim at Xenos as they crawl around, so you really just have to shoot. Try to
conserve ammo with this thing as there will be a ton of Xenos to contend with,
and do that by shooting in bursts. You'll reach a room covered in gunk. Hold
your ground here and waste the rest of the Xenos. If you need reprieve and
run out of Smart Gun ammo, hold LB to show the door you'll go through to reach
the Comm Tower. The Xenos won't pursue you here, so you can just take potshots
at them from safety.

When they start to die down, run around to make them start showing up again
and continue killing all the Xenos. When they've all been killed finally, you
can go through the door to start making your way to the comm tower again.
However, a Xenomorph will attack Winter...

====================
MISSION 5: THE RAVEN
====================
Winter starts this mission trapped to a wall. He escapes. Press B and crouch.
You'll be crouching for a good majority of the rest of the level. Move very
slowly through this area. The large Xenomorph, I assume the titular Raven,
will burst through the ceiling and try to swipe at you. If he succeeds, then
it's a one-hit kill. So move slow so you can avoid taking damage from the
Xenomorph.

Once you get by the Xenomorph, you'll have to move through a complex sewer
system. The lever to the door is being blocked by steam. There is another lever
right next to the steam machine. Pull that lever to turn off the steam. Then
pull the next lever to open the door to the sewer proper.

Stay crouched and keep moving. You'll see these weird husks all over the place.
One of them will start moving. Whenever it starts walking around, stop moving.
Wait for it to crouch into itself and then resume moving slowly through the
sewer.

This part lasts forever, but it's simple. Just move by the husks. When you see
one of them up and walking around, then stop dead in your tracks before
continuing. There will be a lever you'll come across eventually that you can
pull which will cause steam to erupt out of a nearby machine and a bunch of
these Xenos will run to the machine and blow up.

Go room from room, repeating this process. You'll find a door that needs to be
cut open, but be sure to blow up the walking Xenos first by pulling the nearby
lever. Then cut the door open and continue. Repeat this process, going room
to room, slow, and you'll be fine.

Finally, you'll meet up with O'Neal. Except he is behind a sewer gate and
can't be reached for now. Continue through to the tunnel areas, and then big
Xeno from earlier will show up and start chasing you. Run through the door
and turn around, pressing X to weld it shut. Then go to the next door and
keep doing that. As you move through each door, stop to weld it shut so the
Xeno can't catch up with you.

Upon reaching the elevator, press the button to take it to the top. O'Neal will
be waiting for you with a duffel bag full of your stuff. Grab it to get back
all your weapons and gear. Then follow O'Neal outside. Kill all the Xenos out
here and then continue following him to find Bella. She will tell you that
Reid has been taken by the Xenos.

A huge crate will be lead to Reid's area. Fight your way to her, kill the Xenos
around her, and then accompany Reid and Bella back to the comm tower. Now you
have to protect her while she deals with it. When she's done, follow everyone
into the hangar area. More Xenos will swarm in. Kill them all and then move to
the next hangar area.

O'Neal will be captured by the Raven Xenomorph. After Bella and Reid get into a
fight, go through the hangar doors. Drop down the ledge and then crouch. Go
through the tunnel to the right as soon as Raven shows up. Kill the Xenos
and then go through the next little tunnel area as soon as Raven shows up again
to avoid fighting him.

Finally, you'll reunite with O'Neal right next to a Powerloader. Get inside the
Powerloader. Your teammates will deal with the smaller Xenos, so focus on the
big one. Just keep mashing RT to smack him with the right arm. If he gets too
close, press LT to knock him back a bit. It will take quite a few swings, but
finally it will be killed.

====================
MISSION 6: FOR BELLA
====================
This mission begins with a long stretch to the facility. Just push forward
and keep shooting the Xenos as they show up. As you reach this cave system,
acid-spitting Xenos will show up. They, as you can probably guess, spit acid.
Their acid is honestly not that damaging, but it's better if you can kill them
before they can spit any at you.

You'll finally reach the facility, but it is in pretty bad shape. Gather the
loot as you follow O'Neal and Bella through it. You'll then reach an annexed
section of the facility, where there will be turrets set up in the halls.
Crouch down the first hall to avoid the turret fire coming through the nearby
windows.

Then go around the corner and through the door to reach this turret and disable
it so O'Neal and Bella can get through. Then sprint by the second turret, and
ignore the third turret as well. There will be a destroyed vent on the ground
that you can crawl through that will open up to a room with a health pack.
Use it if need be, and then notice the ladder.

The ladder is going up, but you can't use it for some reason. so instead, jump
on the machinery to reach the upper area. Then drop down into the next room.
Cut open the door, then disable the turret that's outside. Cut open the next
door and you'll be able to disable the final turret and everyone can start
moving through the facility together again.

You'll have to move through an outside area with mercs. Go through the crates
so you can flank them. There will be a Heavy amongst them, so take him out
before focusing on the other mercs. When you round the corner, lob a couple of
grenades behind the barricades to take out the rest of the mercs and then
continue to the elevator.

Xenos will show up and start fighting the mercs as well. Let them do their
thing and then wipe out the Xenos. As you move to another outside area, be
wary of the Merc in the distance with a rocket launcher. Go right and into the
building as the mercs and Xenos battle each other. You can flank the mercs
from here. Focus on the one with the RPG first by shooting out the windows and
shooting at him. If he fires a rocket at you, you can easily dodge it from
this distance.

When the mercs are all dead, finish off the Xenos. Then run to the elevator and
pull the lever.

=====================
MISSION 7: ONE BULLET
=====================
Another long hallway awaits, in which you have to kill Xenos as you move. Keep
pushing forward and then you'll reach an area with spotlights. The spotlights
will kill anything that get in the light. Wait for the light to pass and then
sprint by.

You'll reach a cave area with Xenos and a couple more spotlights. Sprint and
jump over the gap to avoid the first spotlight, then find a safe spot and
start killing the Xenos. Then move by the third spotlight and you'll then see
a few mercs on a bridge. You won't be able to use your weapons for this part.
Wait for the mercs to leave, then continue stealthily into the facility proper.

Following the cut-scenes, you'll now have to move through the facility. The
first room you get to will feature two scientists. If they hear you, they will
run to activate the alarm that will in turn release a poisonous gas in the
room unless you can turn it off in time. The game recommends being stealthy,
but you can really just shoot them both quickly with the shotgun and then
continue.

Go through the next room. Then AS SOON as you open the subsequent door, turn
to the left sharply and kill the merc there. Run around the other side and
kill the three or so mercs before any of them can get down the hallway. Take
cover and toss a couple of grenades down the hall to kill any other mercs
that happen to show up.

Continue pushing through the rooms of scientists and killing them first. You
will then move back to an outside area. As soon as you get here, take a left,
as an armored vehicle wll show up and start firing at you. Shoot the tanks by
it to light it on fire, forcing the vehicle to retreat. Kill the mercs as you
move along the rocky path yourself.

Sprint forward. The vehicle will back up through an area below you. Kill the
mercs down there. Grab the health pack if needed, then drop down. Sprint to
cover and get a lay of the situation. You need to reach these crane controls
that will be to your right, if you're facing the facility. The module you need
to destroy is the center area, and the crane will take care of that as well.
You need to get rid of the armored vehicle, too.

Blow up the tanks next to the armored vehicle and it will retreat again. Then
start hugging the cliffside to your right as you move up. Kill the mercs one
by one. The controls will be in a briefcase-looking thing up the slope to the
right of the starting area. Activate the controls once the coast is clear, and
the armored vehicle will be destroyed.

An RPG-equipped merc will guard the doors to the facility, so kill him. Then
go into the facility. Fight your way to the control module room, where you
will find out that you need to disconnect three power cells in order to allow
you to control the power.

Each of the three power cells are easily accessed. There is one that is blocked
by locked doors, but simply go above it and drop through a hole in the ceiling
to access it. There will be two scientists guarding this cell, but only one
scientist will be guarding each of the other two cells. Remove the cells by
pressing X once your enemies are dead and then return to the control room to
pull the lever.

==================
MISSION 8: RAMPART
==================
Follow O'Neal and you'll move through a room with the Alien Queen. Ignore the
Queen for now because there's nothing you can do about her. O'Neal will then
lead you to an outside area crawling with Xenos and Mercs.

Go from cover to cover and kill all the Xenos and mercs as you see them. Grab
any loot, as always, and keep pushing forward. You'll then go through an
indoor facility-like area. You can shoot one of the enemies from behind in the
back of the head as soon as you enter this room. Stay as far back as possible
as you proceed so you can take out the other mercs, then continue following
O'Neal and you'll wind up back outside.

Stay with O'Neal and keep pushing forward. Kill all the enemies you see as you
progress. Finally, you will find the captured marine. Kill all the mercs that
are guarding him, and then a cut-scene will play.

===========================
MISSION 9: HOPE IN HADLEY'S
===========================
Follow O'Neal and Hicks down the street. They will walk in a sort of triangle
formation as the Xenos come from both sides. Kill the Xenos and push forward to
Hadley's Hope. Grab the turret and then return to the streets. Deploy it in
the streets and then enter Hadley's Hope.

You now have to find all the marines. Rush to HQ where you will find a few
marines fighting Xenomorphs. Kill the Xenomorphs in each room. Bring out your
motion tracker to help you locate all the marines. One marine will be trapped
in a room with a Xenomorph and a locked door. Cut him out, eradicate any
Xenomorphs, then resume your search.

The final marine will be trapped underneath a shelf. Help him by pressing X
and then regroup with Cruz. Make your way to the vehicle bay and grab the
turret. Set it up anywhere, and then make sure you're at full health and full
ammo by using the ammo box in the small room here.

Go around the area and grab the smaller pieces of body armor. A full body
armor is next to the ammo boxes, but don't waste it. A few waves of Xenos will
drop into the area, so hold your ground and kill them all. If your body armor
runs out, then go grab the full set of body armor next to the crates. There are
a few health packs in this area as well in case your health gets low.

When these Xenos are dead, the next door will open. Go outside, and then a
huge charger Xeno will appear. This thing is giant and has a large, armored
head. Throw grenades at it and use a flamethrower if you have that as well.
A bunch of smaller Xenos will be crawling around during this fight, but let
your AI companions worry about them for now, as the huge one will only target
you. Sprint away from it and put some distance in between you and the beast and
shoot at its legs when you run out of grenades. When it dies, Cruz will open
the next door.

Run over to the drop pod ship. Remove one of the three fuel lines by pressing
X. Then Xenomorphs will come into the area. Thin them out a bit and look for
body armor before removing the next fuel line. You don't want to be cornered
next to a fuel line, so it's good to make sure that there aren't any Xenos in
your area at least. Remove the third fuel line when ready, and then eliminate
the remaining Xenomorphs.

==============================
MISSION 10: DERELICT RECLAIMED
==============================
Follow your group into the tunnels. Grab the flamethrower on the crate, and
then move deeper into the tunnels. There will be Xenomorph eggs all over the
ground. The flamethrower proves very handy in destroying them. Spray the flames
all over the place to get rid of the eggs and the Xenos that show up.

Fight your way to the elevator. It will need power, so go up the stairs next
to it. Before cutting away the gunk blocking the lever, turn around and kill
the Xenomorph behind you. Then cut away the gunk and pull the lever. Return to
the elevator and ride it up.

Your new goal is to destroy the three AA guns. There are mercs EVERYWHERE, as
well as a few Xenos. Clear the area of mercs. There are huge caches of supplies
dotted around the place. Use your HUD to find them to restock and heal yourself
if needed. The AA gun will be in the center of the area. Ignore it for now and
bring up your motion tracker to find an RPG.

Go to the RPG, which will be next to a disabled armored vehicle. Equip the
RPG and fire three rockets into the AA gun to destroy it. Now continue to the
next area, where the AA gun will be at the top of a tower. There will be more
caches of supplies all over the place in case you need body armor or ammo.
Fight your way through the mercs to get the next RPG, this time in a building
with a bunch of other supplies. Grab it, and then destroy the second AA gun
with it.

As you continue, you'll notice a valley with mercs huddled inside barricades.
Fire grenades down there and take them out as best as possible, then run to
the next RPG. It will be in a crate. Grab the RPG and then destroy the AA gun.
Use the extra rocket to kill any remaining enemies. Then grab the legendary
flamethrower and continue pushing forward.

You'll find a group of survivors. Save them by killing the Xenomorphs in the
area. Then the Xenomorph Queen will show up. Run around and fire at her. Use
the same strategy as you used with the charging Xenos from before. When enough
damage has been done, the queen will burst through a door.

Follow the Queen through the door. Fight your way through the mercs and Xenos
until you reach the ship. Then watch the scenes unfold.

================
MISSION 11: HOME
================
The final boss fight of the game is simple. What you need to do is pull the
first manual release switch. Then run around the map in a circle, grabbing all
the armor and such as you go, so that the Queen can't attack you. Then pull
the second switch, which will be across from the first. Repeat the process with
the last two switches.

Then go behind the loader where a button is. Wait for the Queen to get close,
and then press the button to launch her into space. If the Queen won't get
close, shoot her to get her attention.

- - - - - - - - - - - - - - - - - - - - - - - - - - - - - - - - - - - - - - - -
3. Versus
- - - - - - - - - - - - - - - - - - - - - - - - - - - - - - - - - - - - - - - -
Aliens: Colonial Marines supports an online Versus mode. There are four
different game modes to play, and a variety of maps.

============
....MAPS....
============
Origin
Excavation
Last Hope
The Hive
Adrift

===============
TEAM DEATHMATCH
===============
There are two rounds. In one round, you'll control the marines, and in the
other round, you control the Xenomorphs. Typical Team Deathmatch rules apply -
whoever gets the most kills wins.

=============
EXTERMINATION
=============
In this mode, the Xenomorphs and the marines have two different goals. The
Xenos have to protect their eggs by not allowing marines arm any explosives
throughout the area set to destroy egg clusters. The marines, meanwhile, need
to activate these bombs by standing by them for a set amount of time until
that area is captured.

==============
....ESCAPE....
==============
The marines have to run from objective to objective and escape the map in 15
minutes. The constantly spawning Xenomorphs have to stop them from escaping
within the time limit by slowing their progress through killing them and such.

============
..SURVIVOR..
============
Marines have a set amount of lives and have to battle against Xenos that
constantly spawn. Marines have to survive for the amount of time that is set
while holding their ground against the Xenos.

- - - - - - - - - - - - - - - - - - - - - - - - - - - - - - - - - - - - - - - -
4. Arsenal Upgrades
- - - - - - - - - - - - - - - - - - - - - - - - - - - - - - - - - - - - - - - -
By leveling up your marine (done through multiplayer and campaign), you earn
commendations. These commendations can be spent on upgrading all your various
weapons in the game. You can also purchase new skins and such for your marine,
plus customize loadouts.

The Xenomorphs can also be customized in similar ways. You can only earn
Xenomorph XP by playing the multiplayer mode.

- - - - - - - - - - - - - - - - - - - - - - - - - - - - - - - - - - - - - - - -
5. Service Record
- - - - - - - - - - - - - - - - - - - - - - - - - - - - - - - - - - - - - - - -
Game progress, such as your level for Xenomorphs and marines and such, is
tracked here.

================
SPECIAL PROJECTS
================
Special Projects are the collectibles hidden throughout the game. There are
35 dog tags, 6 legendary weapons, and 12 audio logs. You can see which
collectibles appear in what stage by checking that stage in the main menu.

=============
...RECORDS...
=============
Stats for your progress in the campaign and your performances in multiplayer
modes are housed ehre.

==============
..CHALLENGES..
==============
There are three different types of challenges. There are marine challenges,
campaign challenges, and Xenomorph challenges. You can check your currently
active challenges at any time in the game by pressing start.

============
ACHIEVEMENTS
============
There are 50 achievements to unlock in Alien: Colonial Marines. You achievement
progress is also tracked here. If you click on this, it will take you to the
Xbox Guide menu to see your achievements.

- - - - - - - - - - - - - - - - - - - - - - - - - - - - - - - - - - - - - - - -
6. Conclusion
- - - - - - - - - - - - - - - - - - - - - - - - - - - - - - - - - - - - - - - -
I hope this guide helped you complete Aliens: Colonial Marines on Xbox 360,
PlayStation 3, PC, and Wii U! Please e-mail if you have any questions, comments
or concerns. And be sure to check out all my other content on Cheat Masters and
GameFAQs!
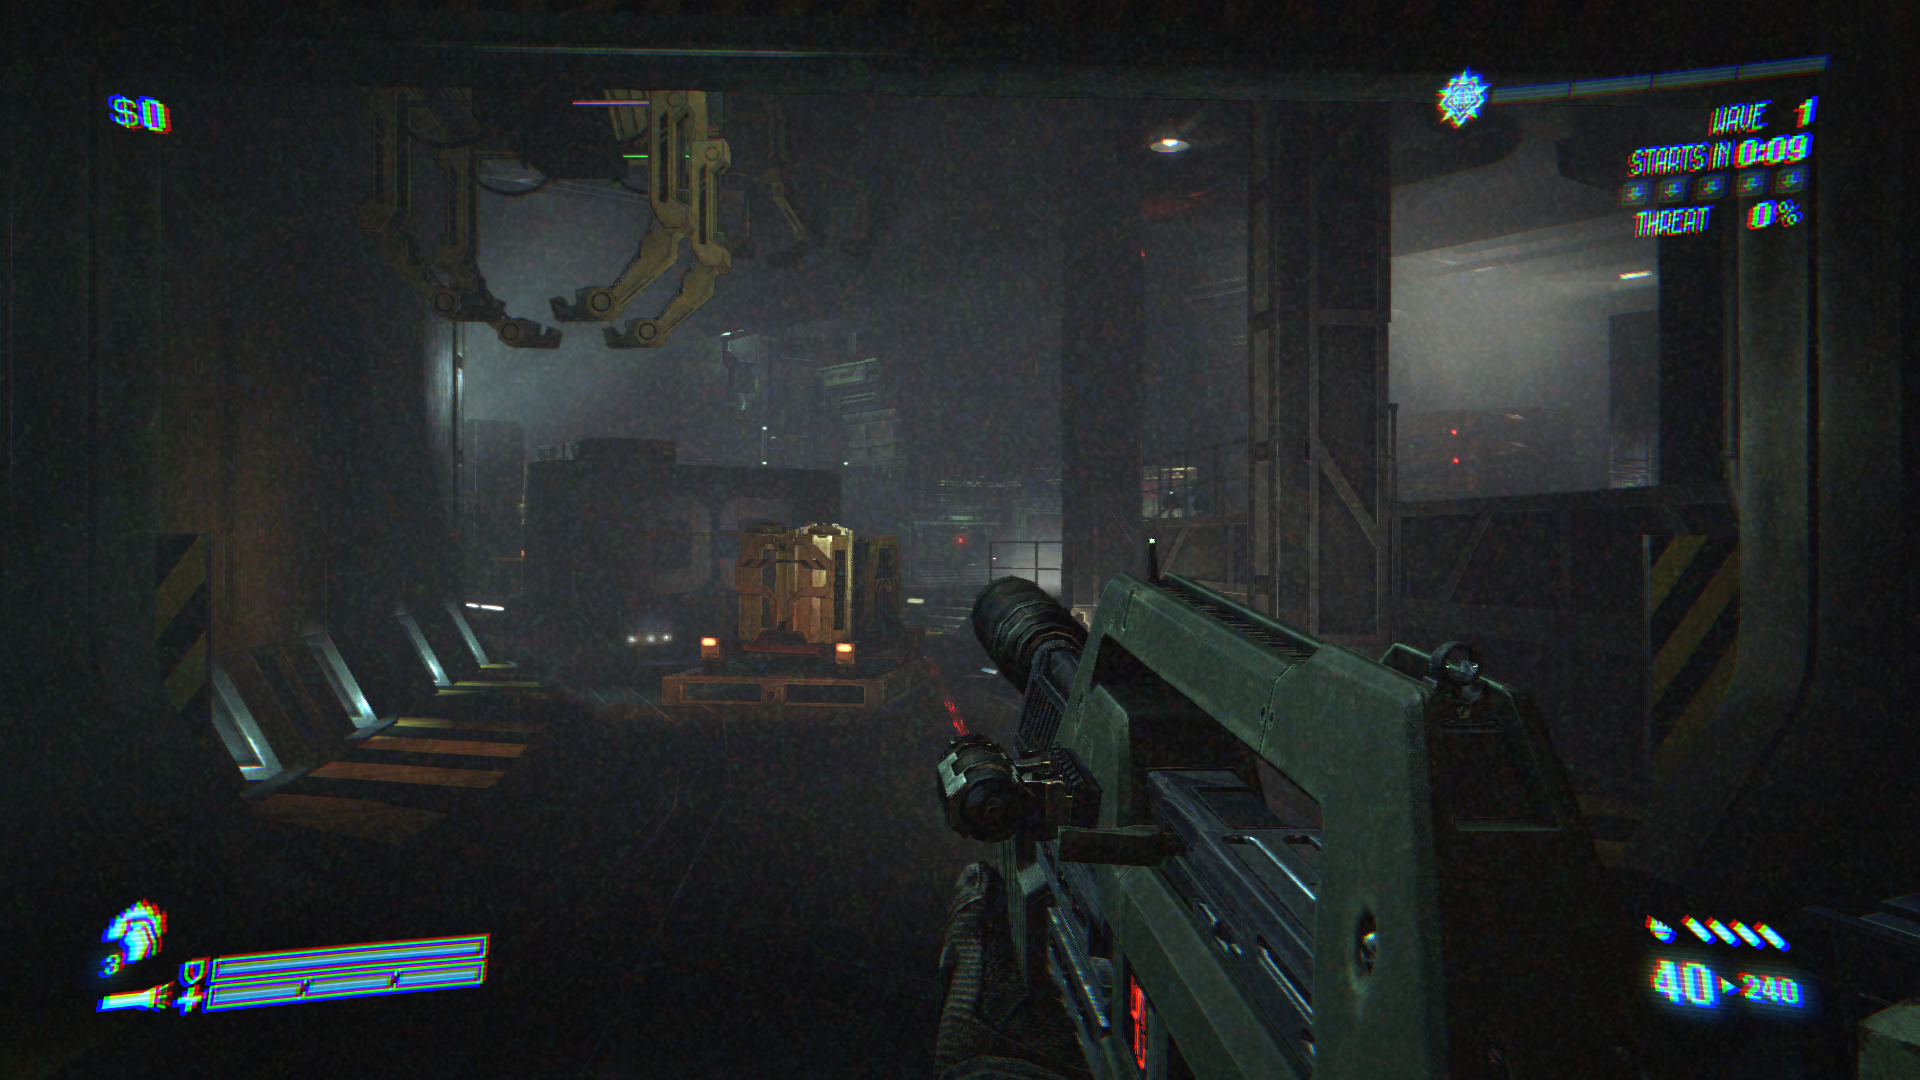
Description: Adrift is a standard multiplayer map set aboard the USS Sulaco in orbit above LV-426. The layout emphasizes interior close-quarters combat and features special weapon pickups including the M240 Incinerator Unit and the M5 RPG Launcher. Supported modes: Team Deathmatch, Extermination.
Description: Autopsy is a DLC multiplayer map from the Reconnaissance Map Pack. Set within a damaged yet operational Weyland-Yutani facility, it features two-level corridors and laboratory spaces with consistent interior lighting. Special weapon pickups include the M56 Smart Gun, M240 Incinerator Unit, and the M5 RPG Launcher. Supported modes: Team Deathmatch, Extermination.
Description: Broadside is a DLC map from the Bug Hunt Map Pack and is designed exclusively for Bug Hunt. Set aboard the USS Sulaco alongside the USS Sephora in orbit around LV-426, it reuses campaign locations with several sealed routes due to the absence of welders. The environment includes side rooms, corridors, control spaces, and a flight deck with a suspended UD-4L Cheyenne prepared for deployment.

Description: Condemned is a standard multiplayer map set in a cargo bay outpost on LV-426 near Hadley’s Hope. The map centers on a compact, three-level building with multiple entry routes and sealable doors via Survival Ops, while the surrounding exterior offers limited cover. A UA 571-C Remote Sentry can be found in a ground-floor locker, and the M56 Smart Gun is available as a special weapon pickup. Supported mode: Survivor.
Description: Emergency Evac is a standard multiplayer map built exclusively for Escape. Set on LV-426 within a surface facility connected to the Hadley’s Hope complex, players begin in an exterior combat zone before pushing through the airlock and into the interior. Special weapon pickup: M56 Smart Gun. Supported mode: Escape.
Description: Excavation is a standard multiplayer map set at a Weyland-Yutani base camp on LV-426 near Hadley’s Hope. The space is primarily outdoors, featuring several buildings and vehicles under nighttime conditions. Special weapon pickups include the M240 Incinerator Unit and the M56 Smart Gun. Supported modes: Team Deathmatch, Extermination.
Description: Exodus is a DLC map from the Movie Map Pack and supports Escape only. Set aboard the doomed USS Sulaco in orbit above LV-426, it features multi-level progression with vents and air ducts accessible only to Aliens. The route moves from a prep area through Fusion Coolant and the Generator Room to a service rail leading to an EEV extraction. Special weapon pickups include the M56 Smart Gun, M5 RPG Launcher, and the M240 Incinerator Unit. Supported mode: Escape.
Description: Flushed Out is a standard multiplayer map designed exclusively for Escape. Set within a LV-426 facility near Hadley’s Hope, it progresses through multiple phases: a sewer approach, a vehicle garage, tight corridors requiring a lockdown and airlock hack, and a final outdoor extraction area where players must call and board a dropship under pressure. Special weapon pickups include the M240 Incinerator Unit and the M56 Smart Gun. Supported mode: Escape.
Description: Fury 161 is a DLC map from the Movie Map Pack set within the deteriorating Fiorina 161 prison facility from Alien³. Its industrial interiors encourage close-range engagements and controlled sightlines. Special weapon pickups include the M240 Incinerator Unit, M56 Smart Gun, and the M5 RPG Launcher. Supported modes: Team Deathmatch, Extermination.
Description: Grief is a DLC map from the Reconnaissance Map Pack depicting a damaged but functional section of a Weyland-Yutani facility on LV-426 with consistent interior lighting and corridor-heavy routing. Special weapon pickups include the M56 Smart Gun, M240 Incinerator Unit, and the M5 RPG Launcher. Supported modes: Team Deathmatch, Extermination.
Description: Processor is a DLC map from the Movie Map Pack set in the heart of the Xenomorph Hive within the Atmosphere Processing Plant seen in Aliens. The map blends industrial structure with heavy organic infestation. Special weapon pickups include the M56 Smart Gun, M240 Incinerator Unit, and the M5 RPG Launcher. Supported modes: Team Deathmatch, Extermination.
Description: Shipwreck is a DLC map from the Reconnaissance Map Pack and is a large interior environment aboard the USS Sulaco, spanning corridors, cargo bays, walkways, and engineering areas. Special weapon pickups include the M56 Smart Gun, M240 Incinerator Unit, and the M5 RPG Launcher. Supported modes: Team Deathmatch, Extermination.
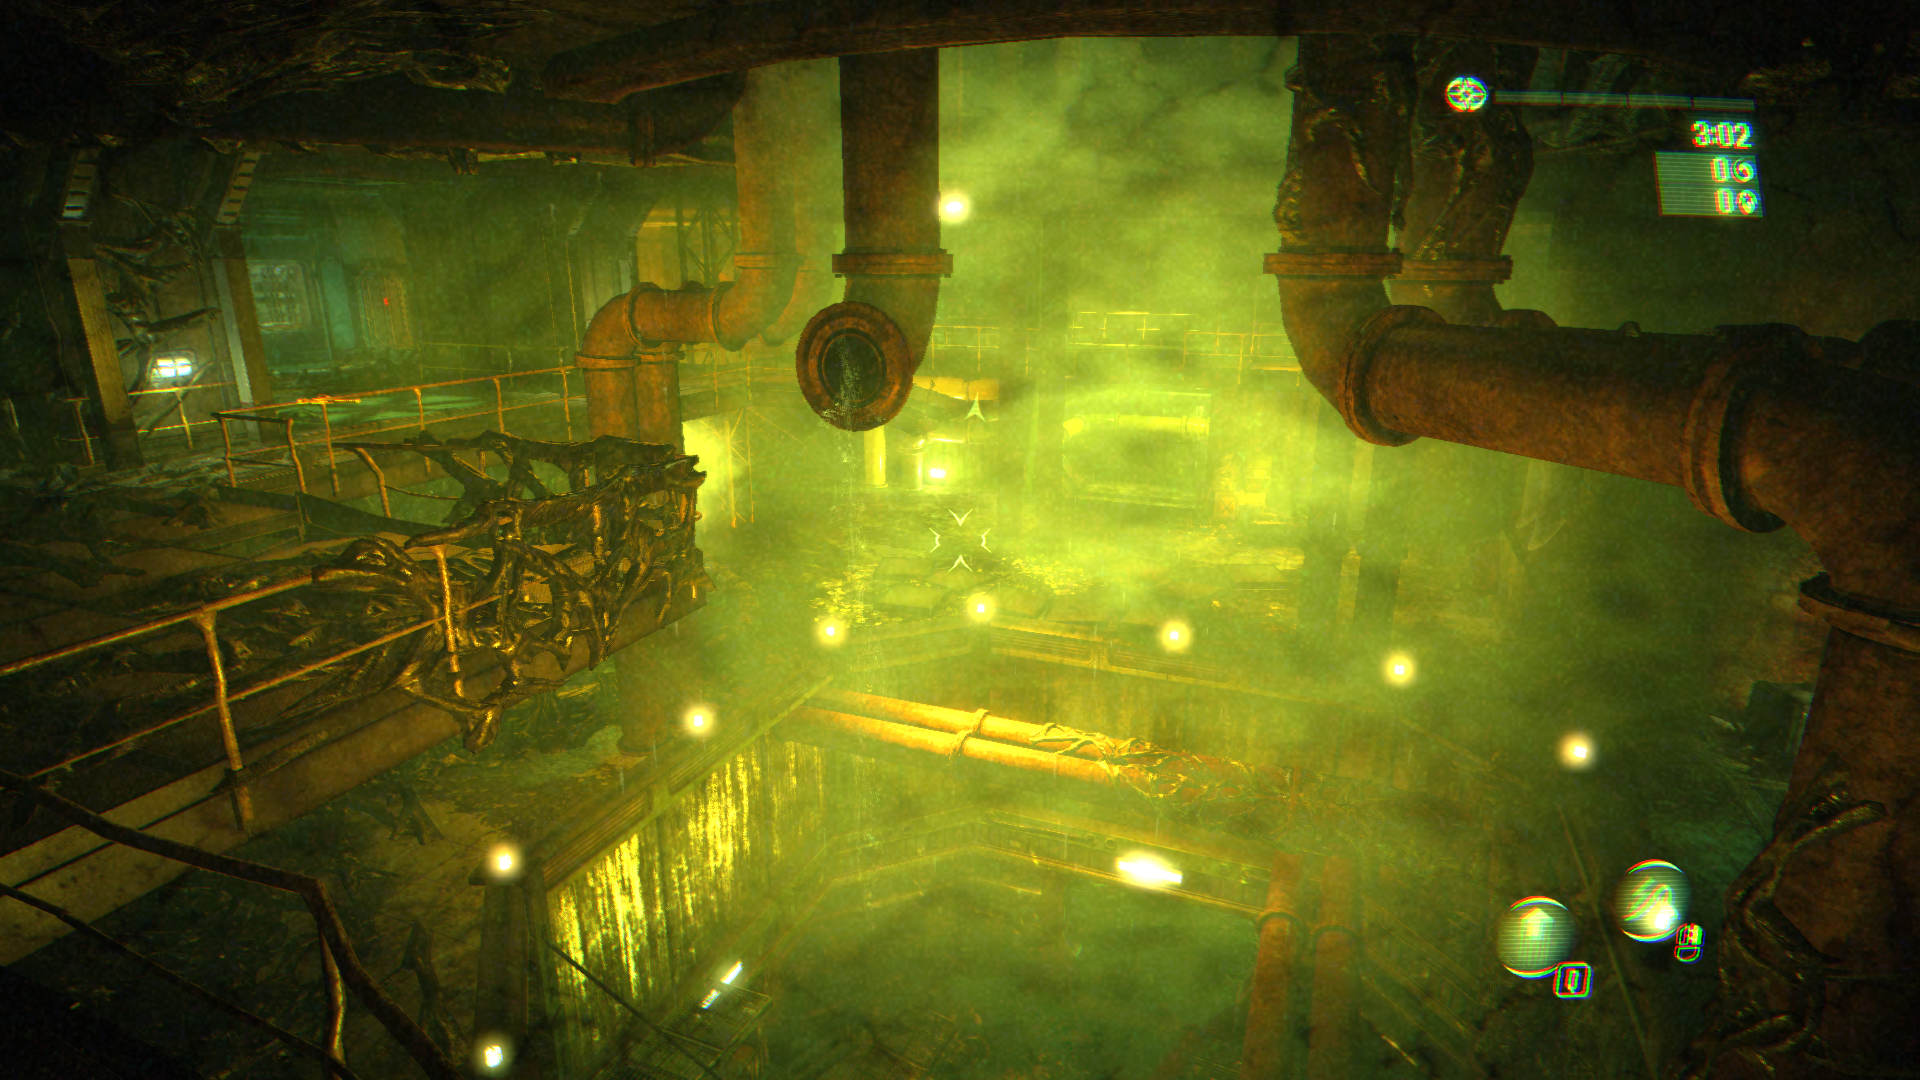
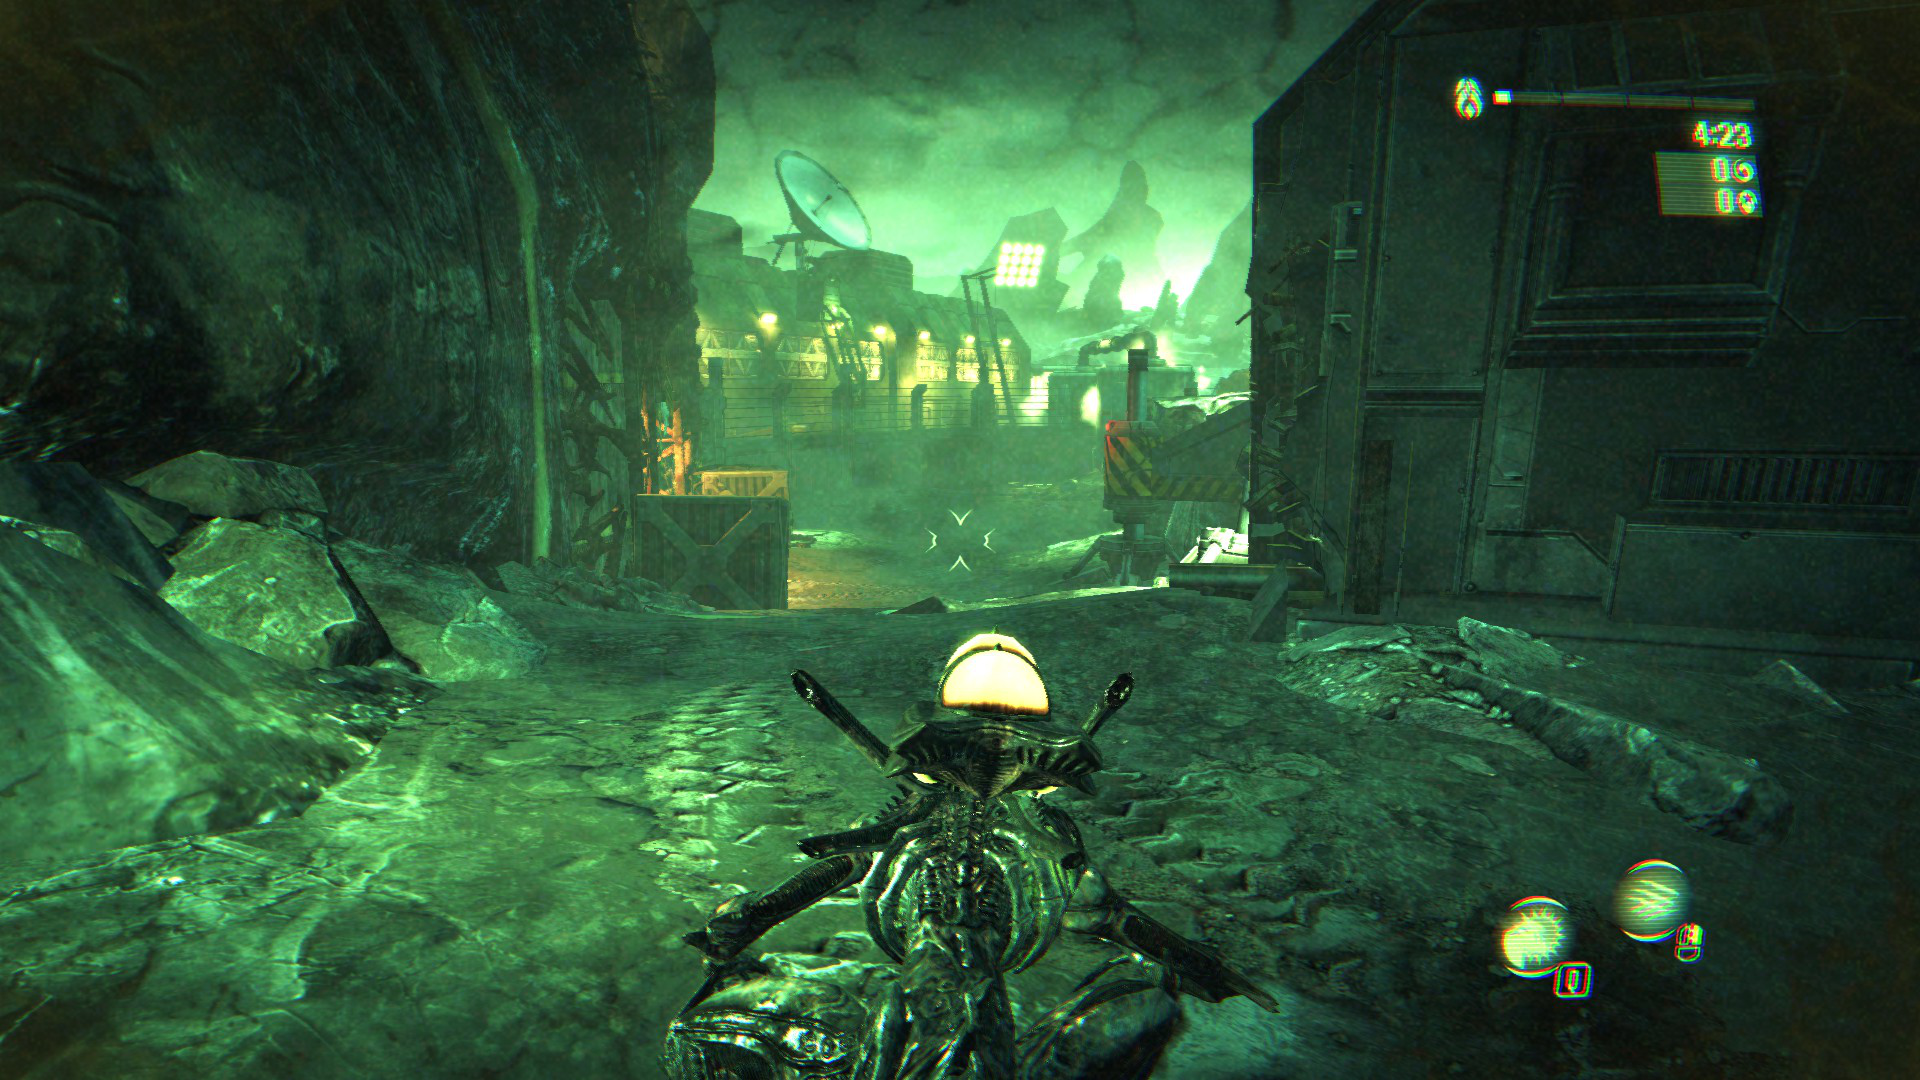
Description: The Hive is a standard multiplayer map set within an Xenomorph hive environment, likely tied to the Hadley’s Hope complex. It features a distinctive three-level structure: a lower area filled with greenish-yellow water, a mid-level dominated by hive growth, and an upper network of catwalks. Special weapon pickups include the M240 Incinerator Unit, M5 RPG Launcher, and the M56 Smart Gun. Supported modes: Team Deathmatch, Extermination.
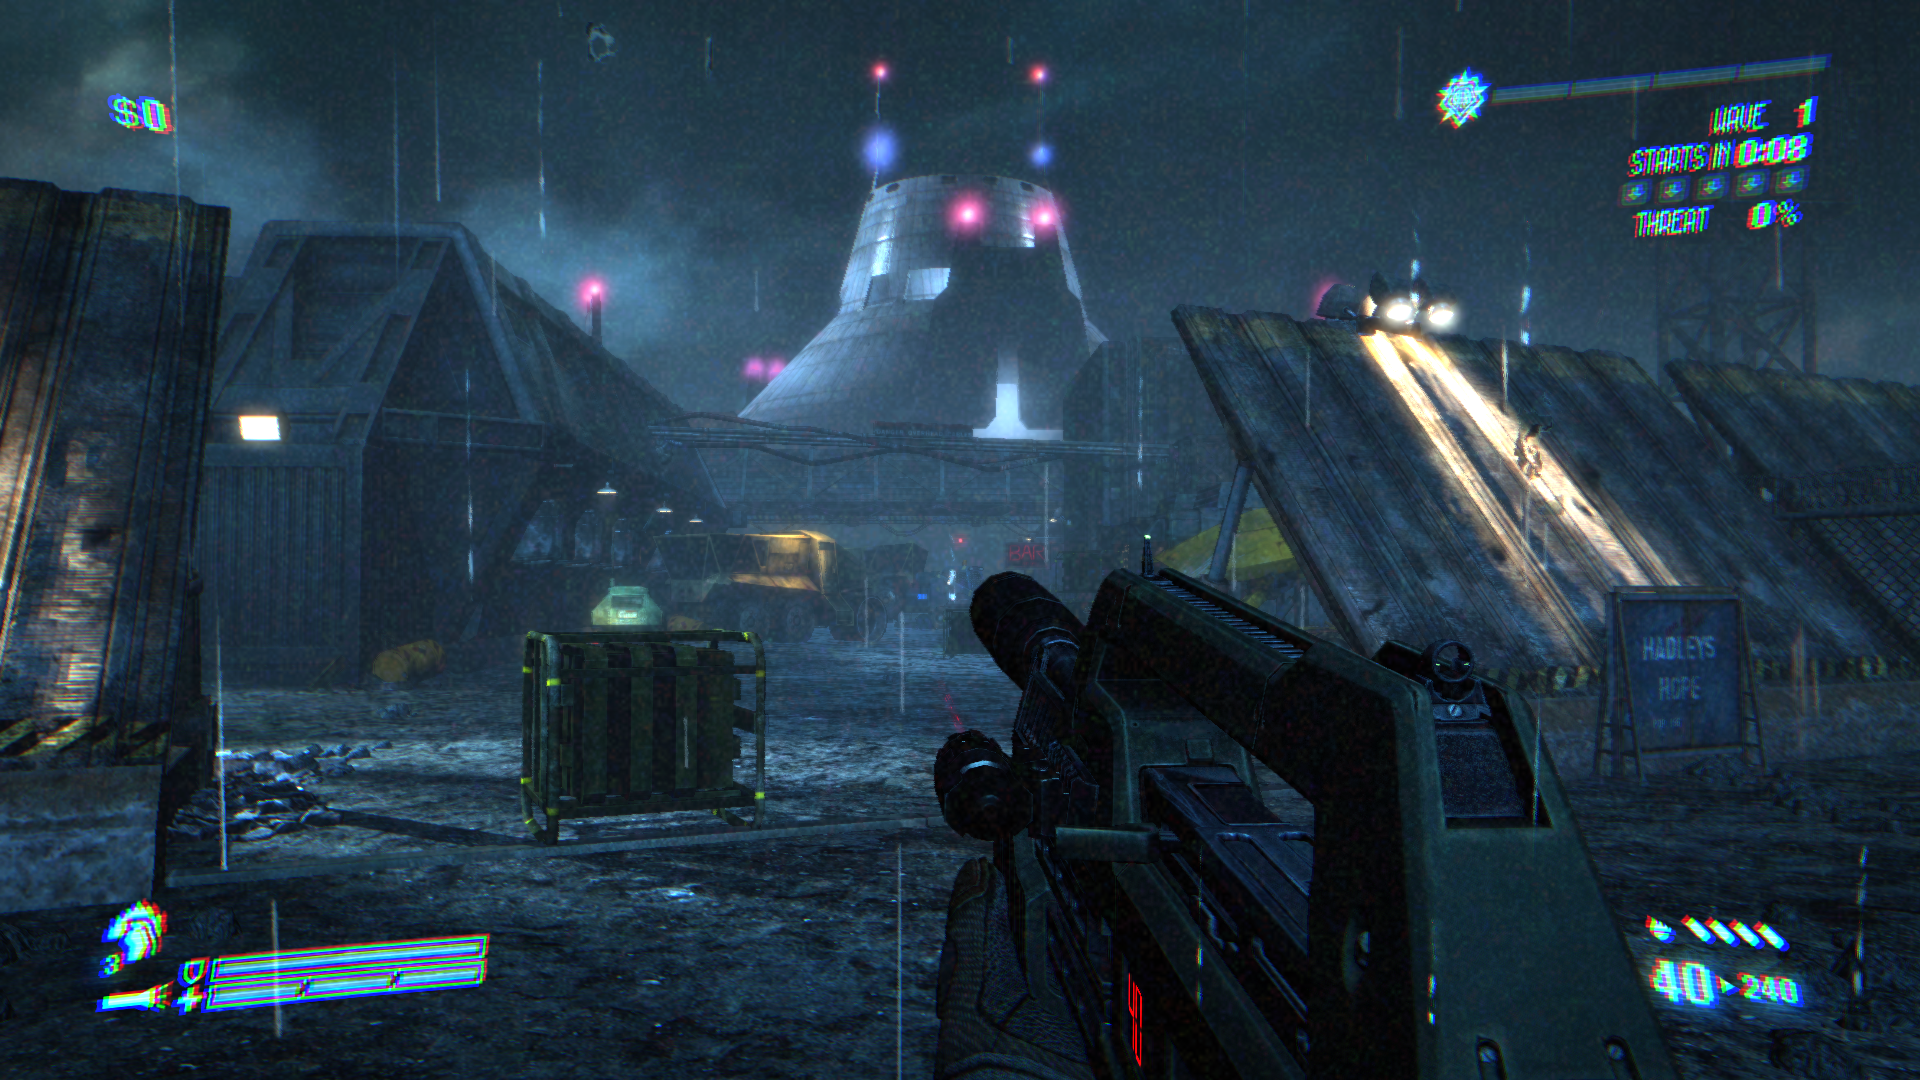
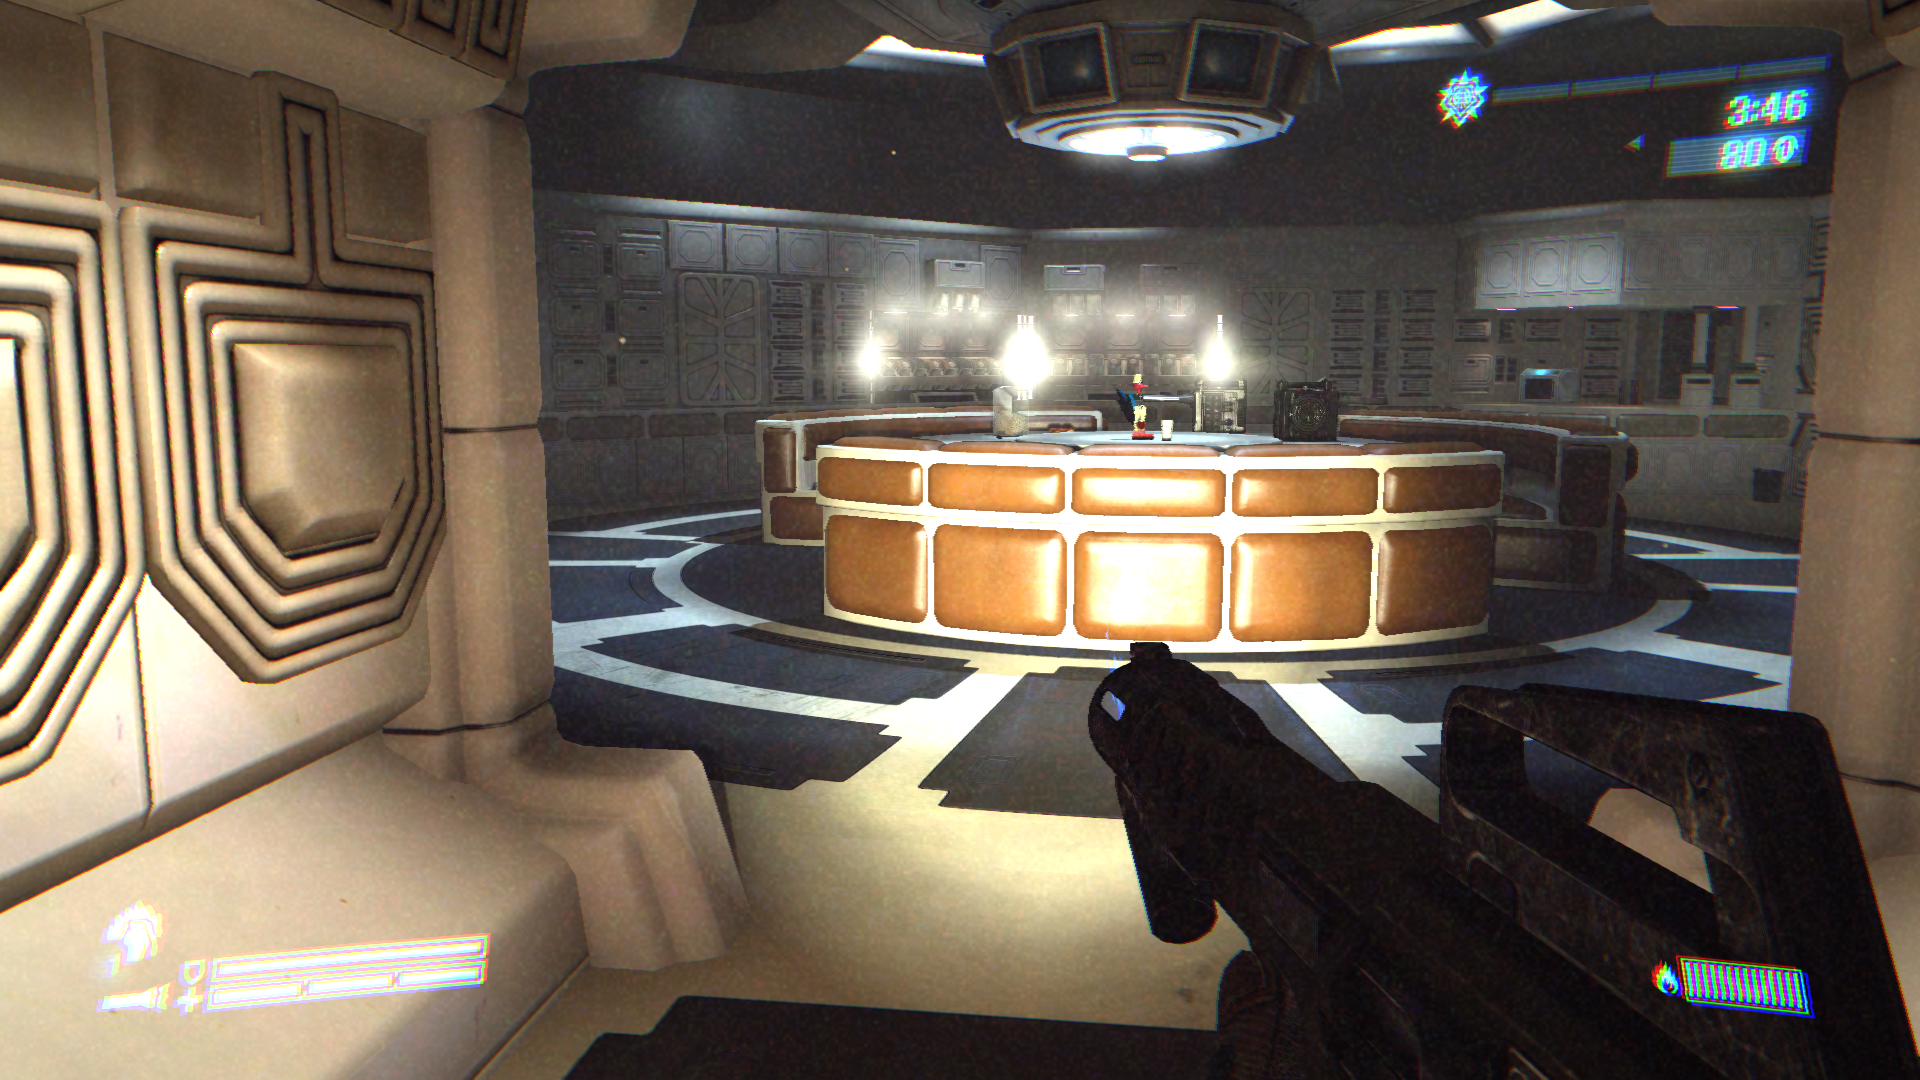
Description: Tribute is a DLC map from the Bug Hunt Map Pack and supports Bug Hunt only. Set on LV-426, it depicts Hadley’s Hope and the Atmosphere Processor in an undamaged state, including recognizable locations such as Operations, Medical Laboratories, Crew Quarters, and the Morgue.
Description: Last Hope is a standard multiplayer map built from Hadley’s Hope colony interiors, combining narrow corridors with cargo-bay spaces and a crashed APC as a central landmark. Special weapon pickups include the M56 Smart Gun, M5 RPG Launcher, and the M240 Incinerator Unit. Supported modes: Team Deathmatch, Extermination.
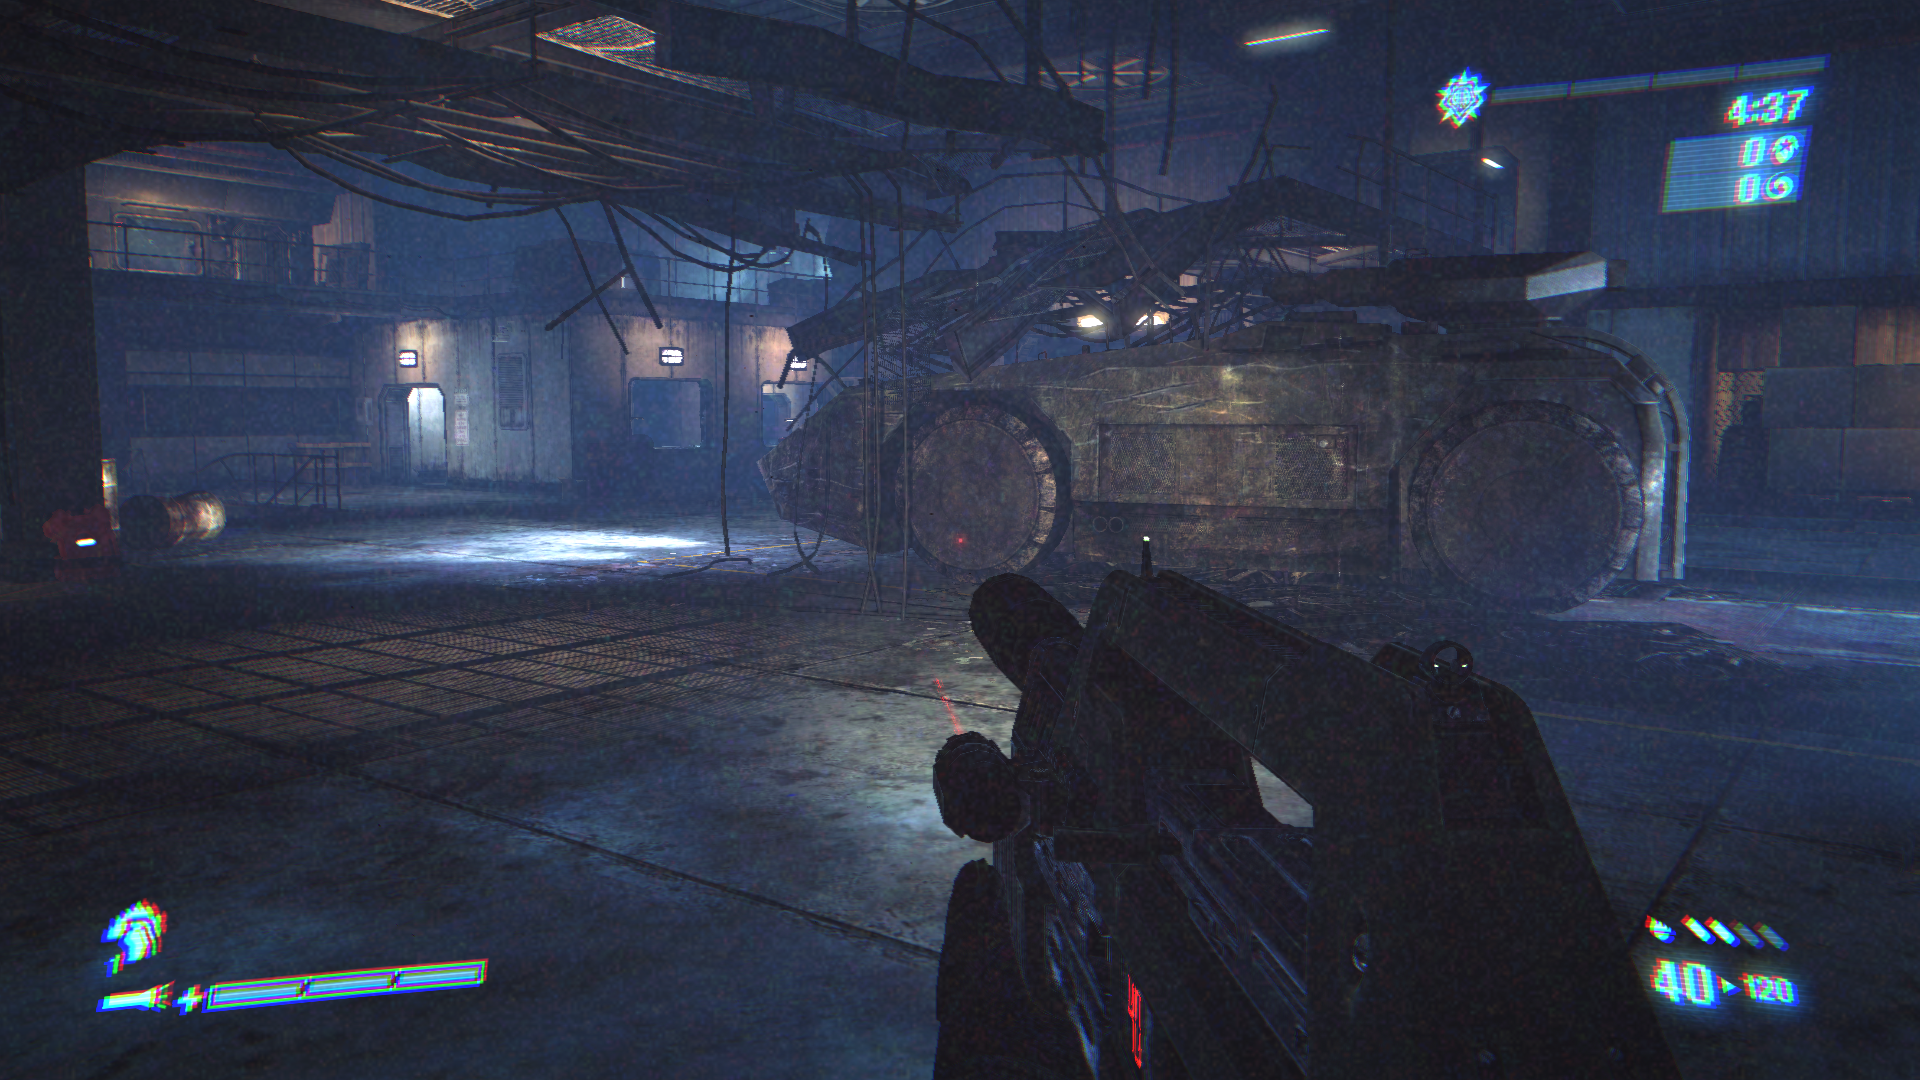
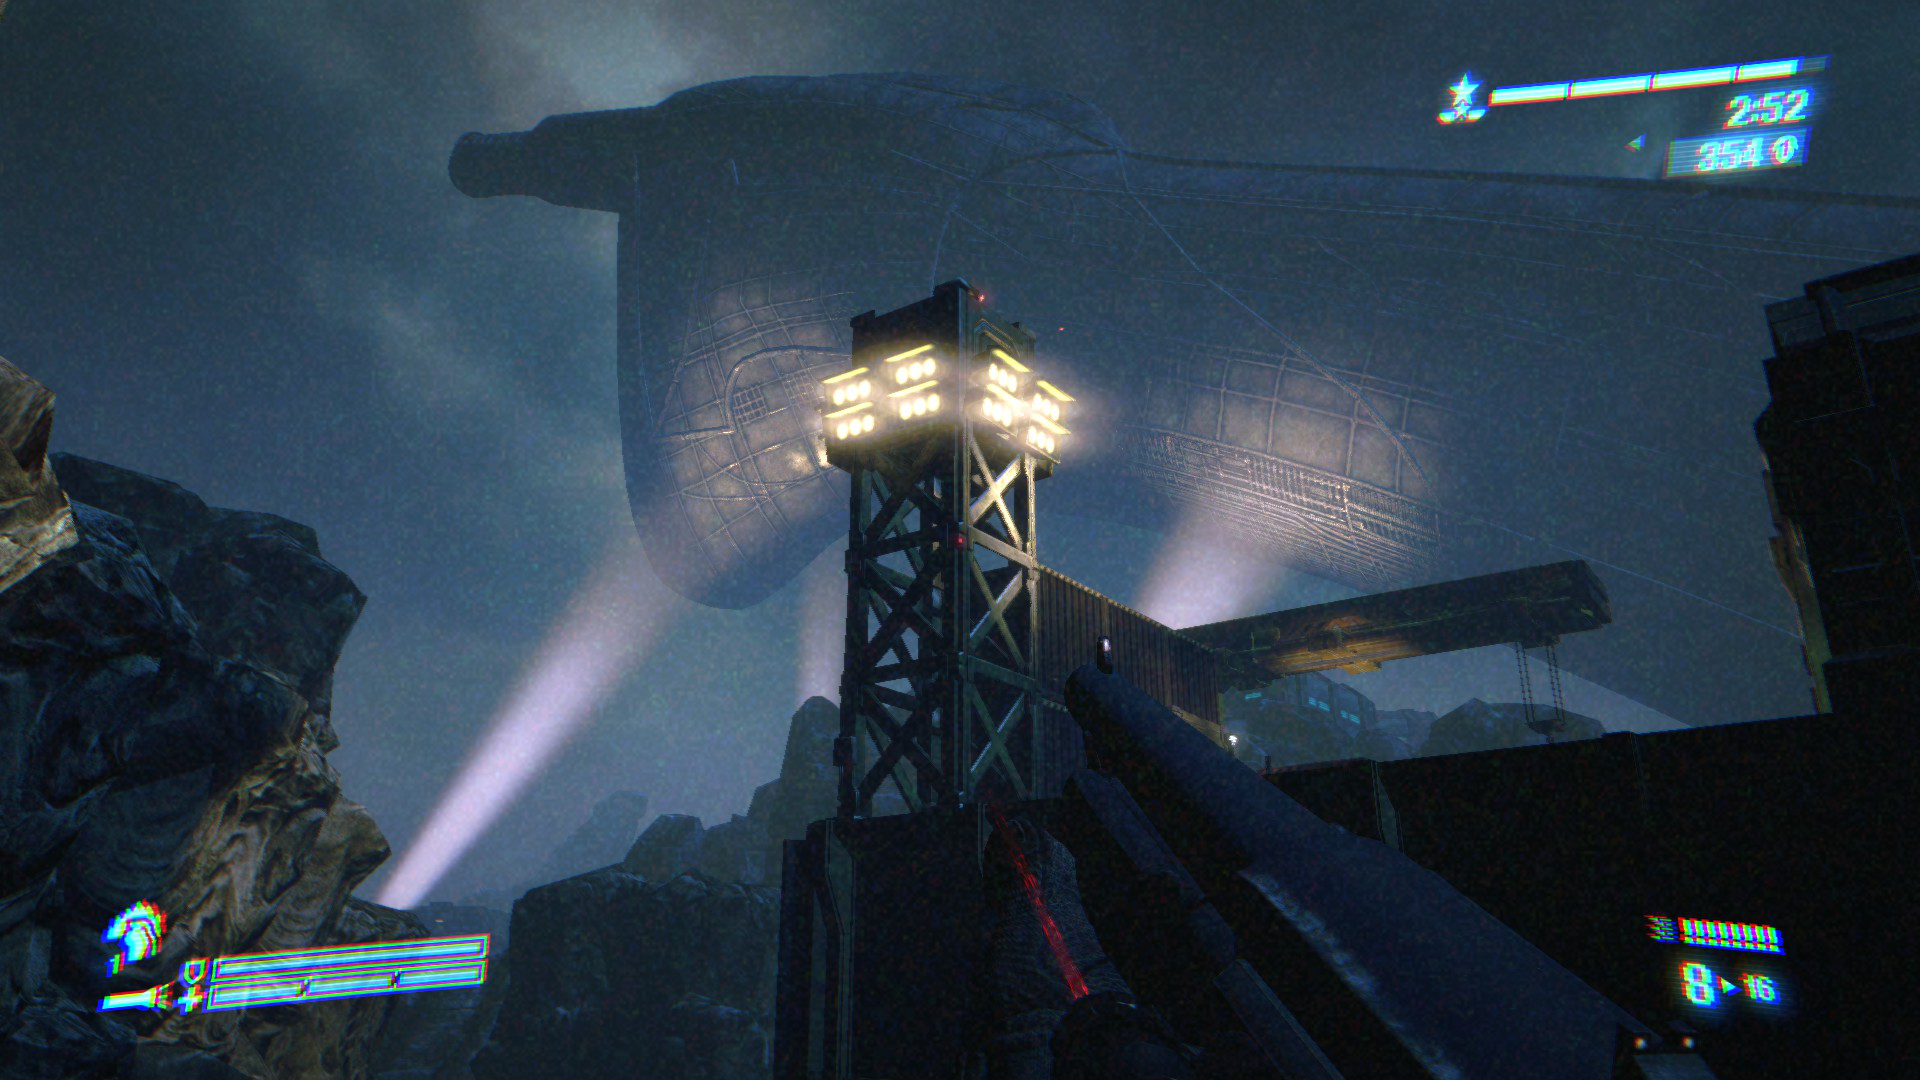
Description: Mercenary is a DLC map from the Bug Hunt Map Pack and supports Bug Hunt only. Set among outer colony structures on LV-426 connected to Hadley’s Hope, it includes colony interiors, APC cargo bays, control rooms, and exterior staging areas with containers, comms towers, and abandoned vehicles. The map is fenced off from surrounding zones, with the Derelict visible in the distance.
Description: Nostromo is a DLC map from the Movie Map Pack and supports Survivor only. Set aboard the USCSS Nostromo from Alien, it focuses on defensive holdouts within confined ship interiors as Marines withstand Xenomorph pressure. Special weapon pickups include the M56 Smart Gun and the M240 Incinerator Unit. Supported mode: Survivor.
Description: Off the Grid is a DLC map from the Reconnaissance Map Pack and supports Survivor only. It is set on the surface of LV-426 within structures situated near the Derelict. Special weapon pickups include the M56 Smart Gun and the M240 Incinerator Unit. Supported mode: Survivor.
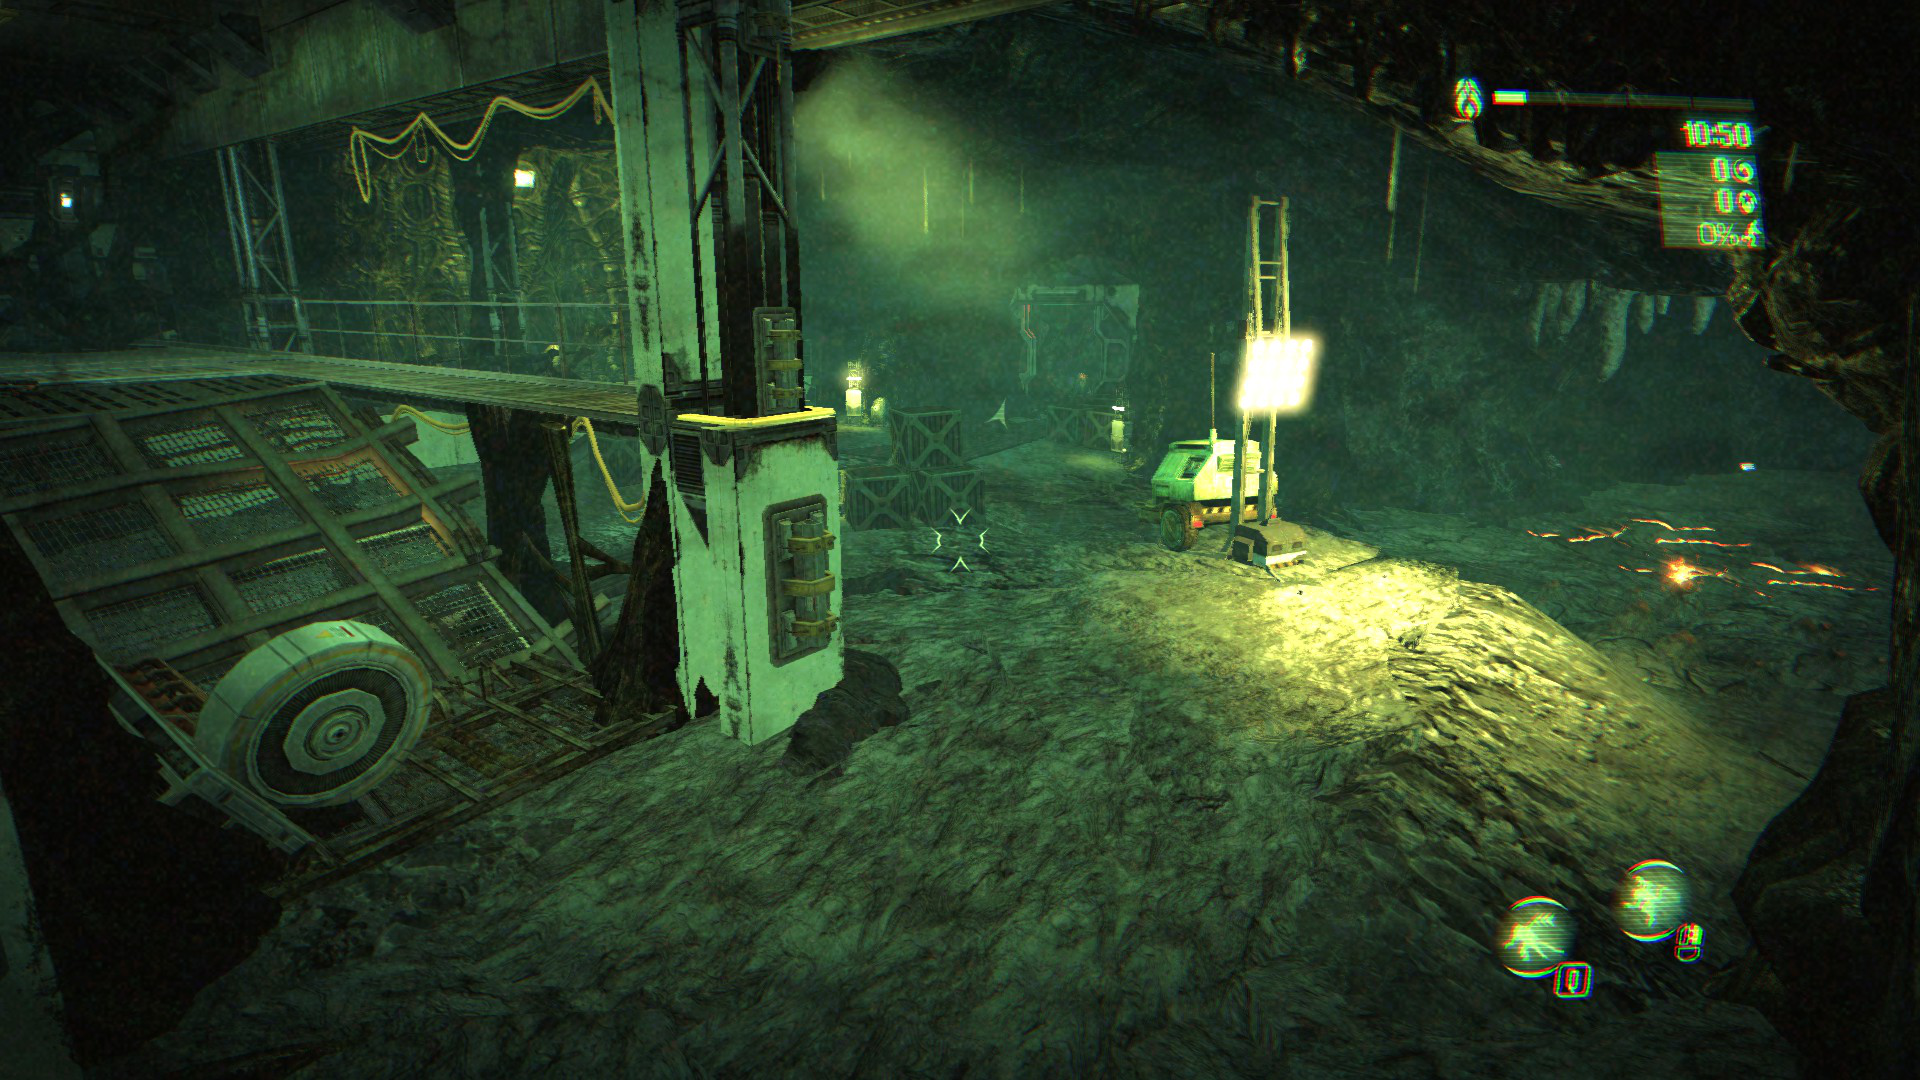
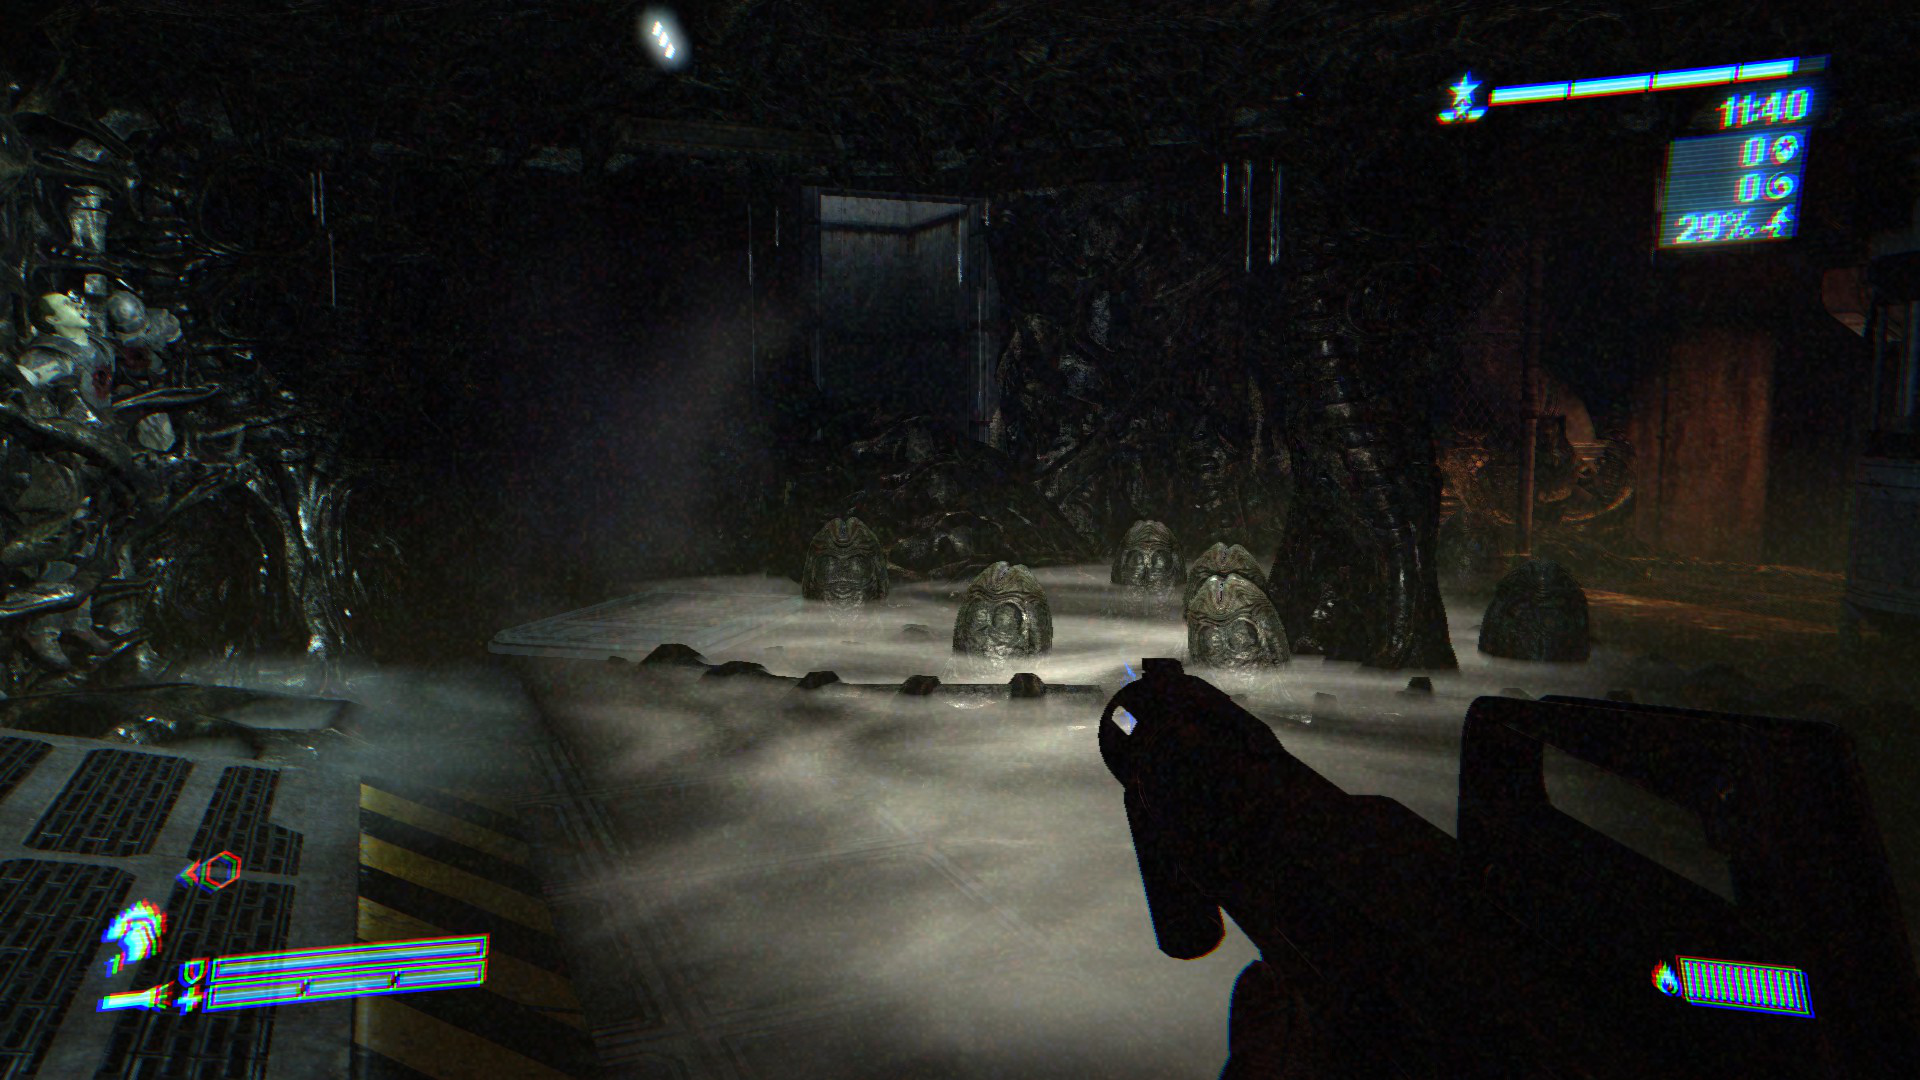
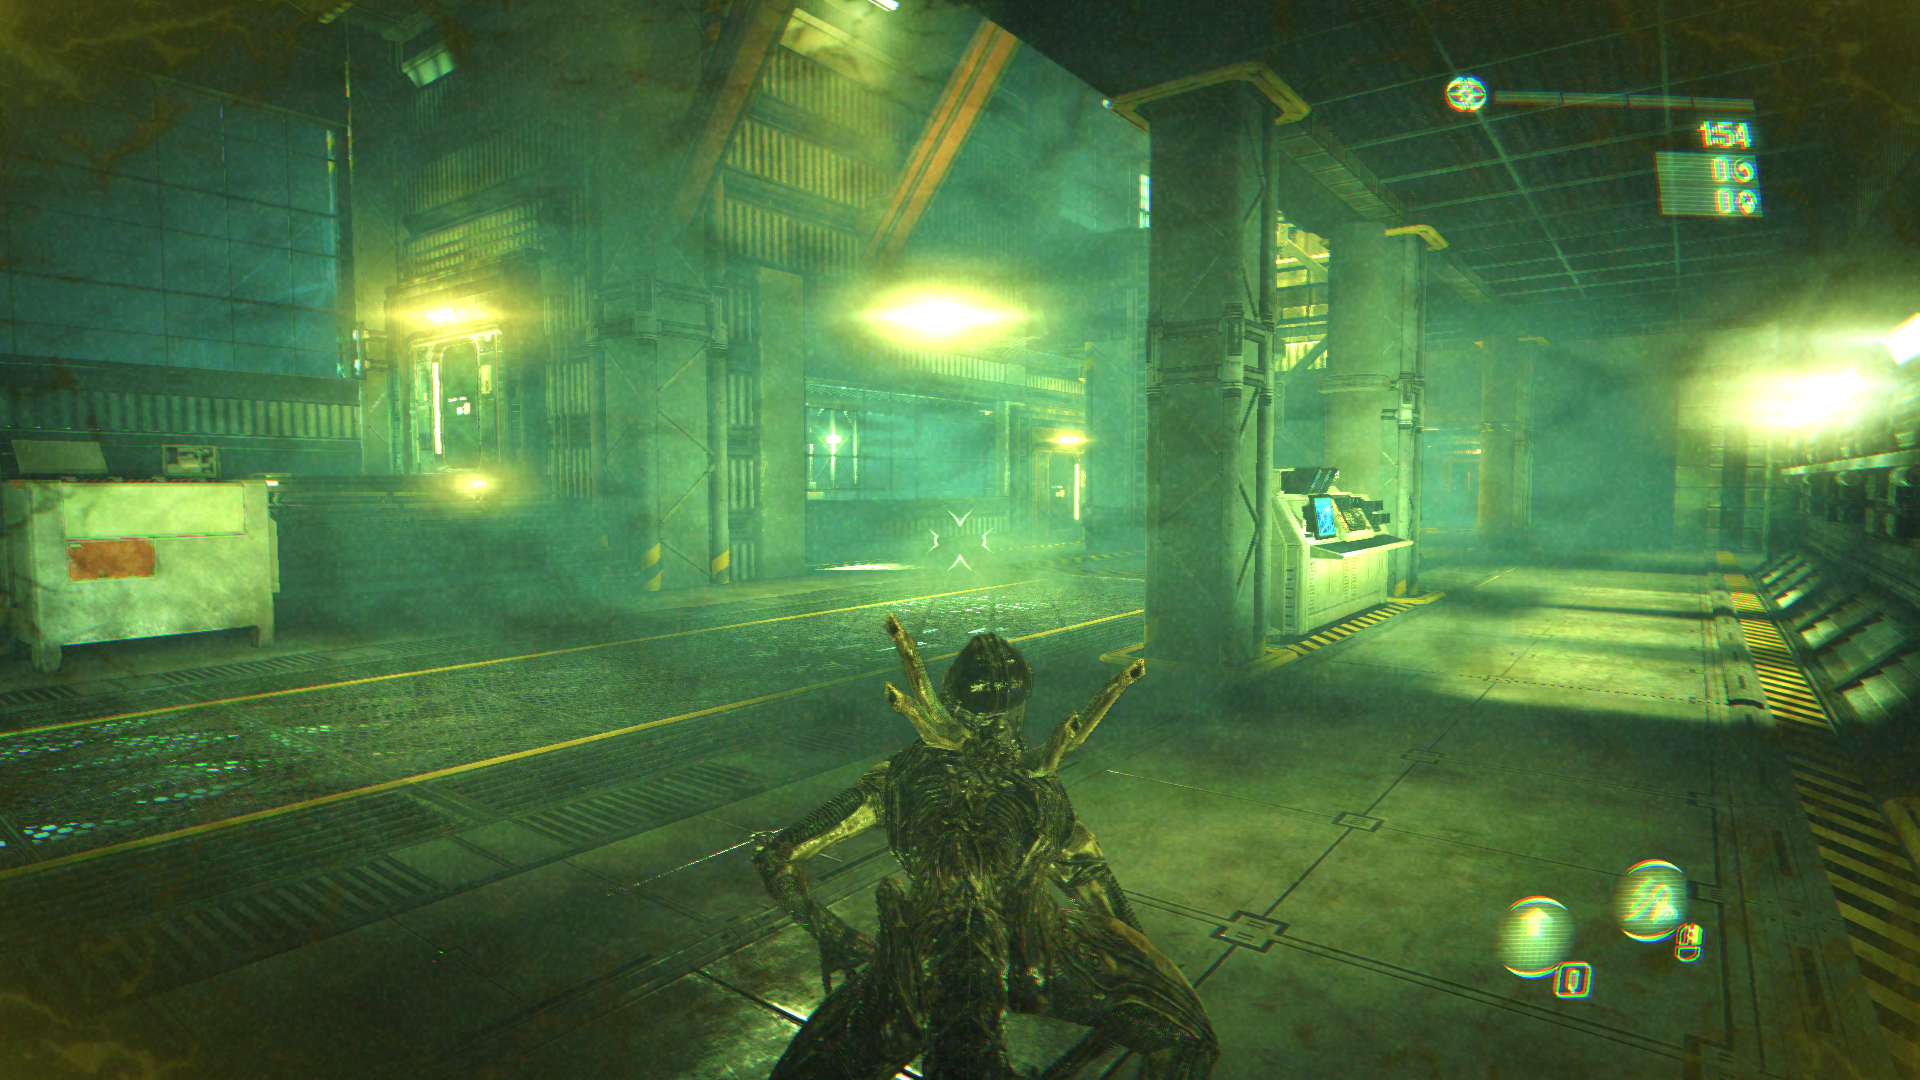
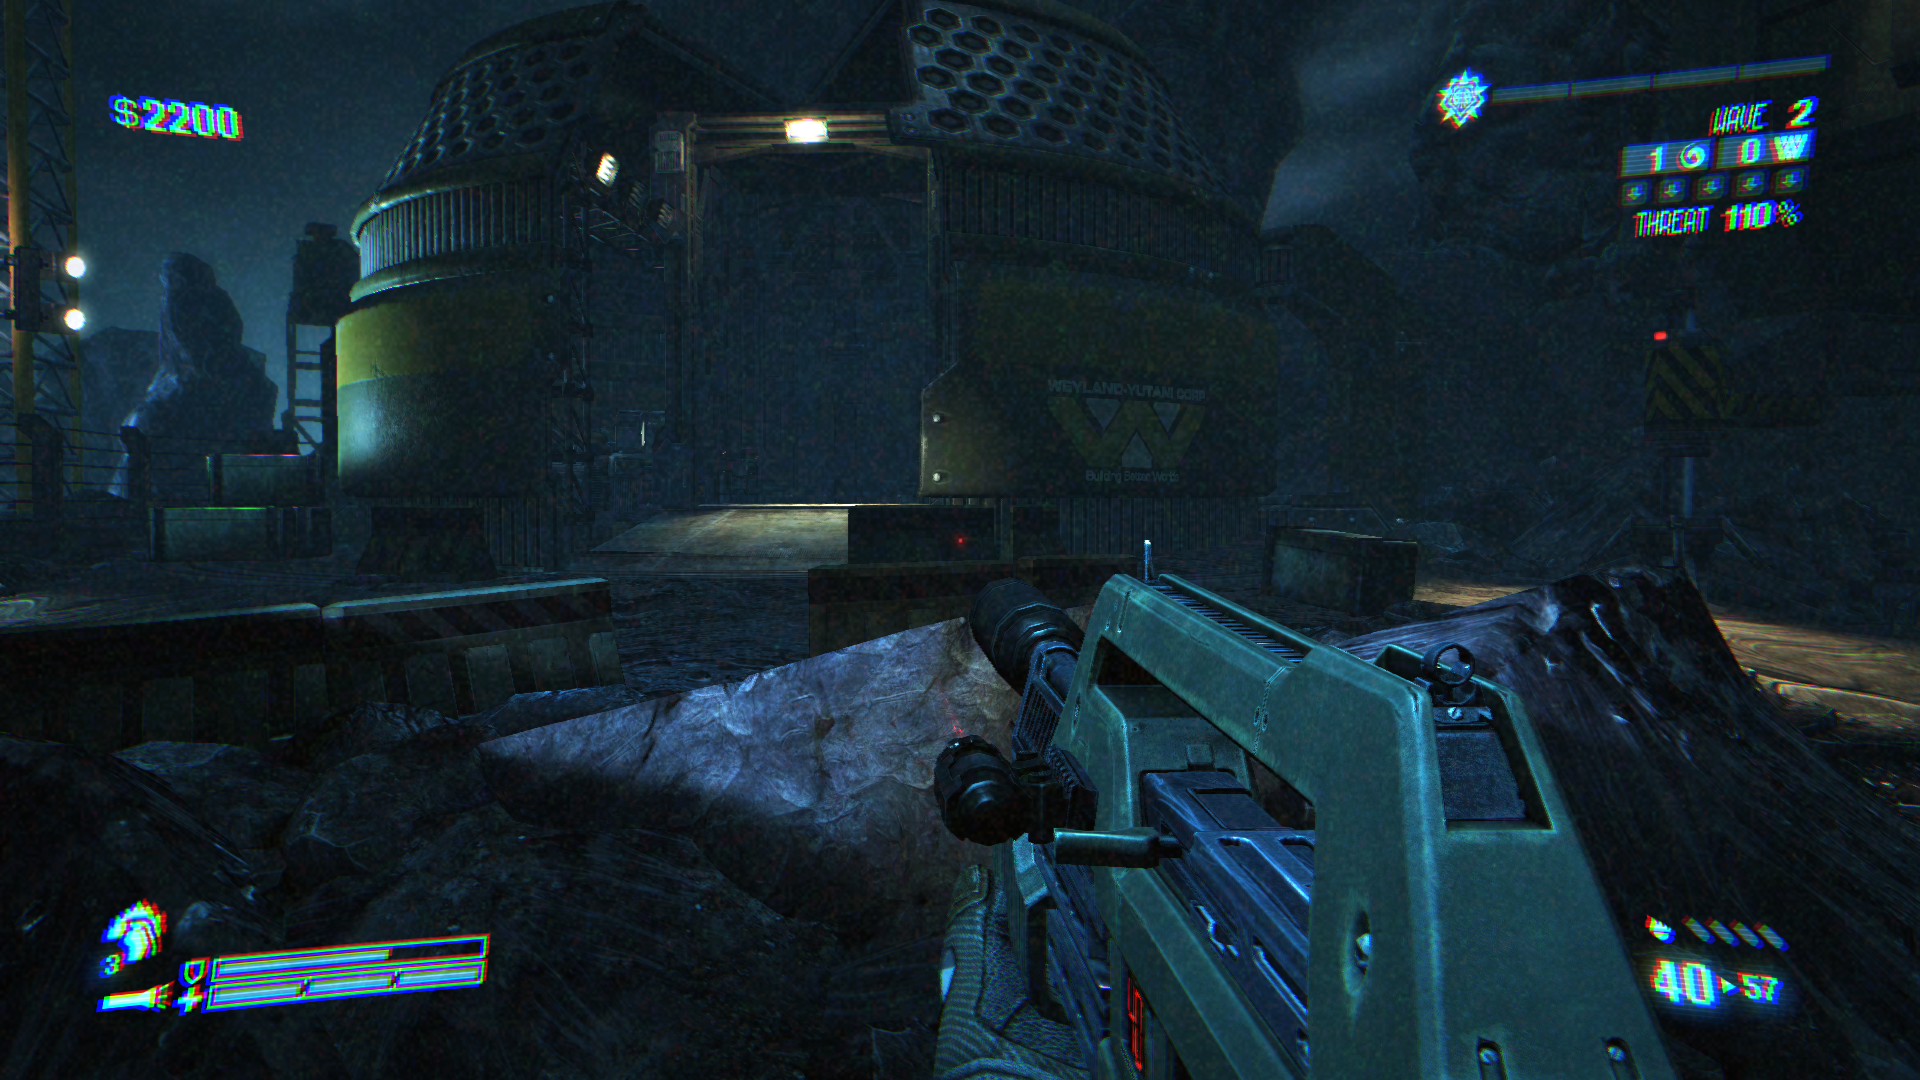
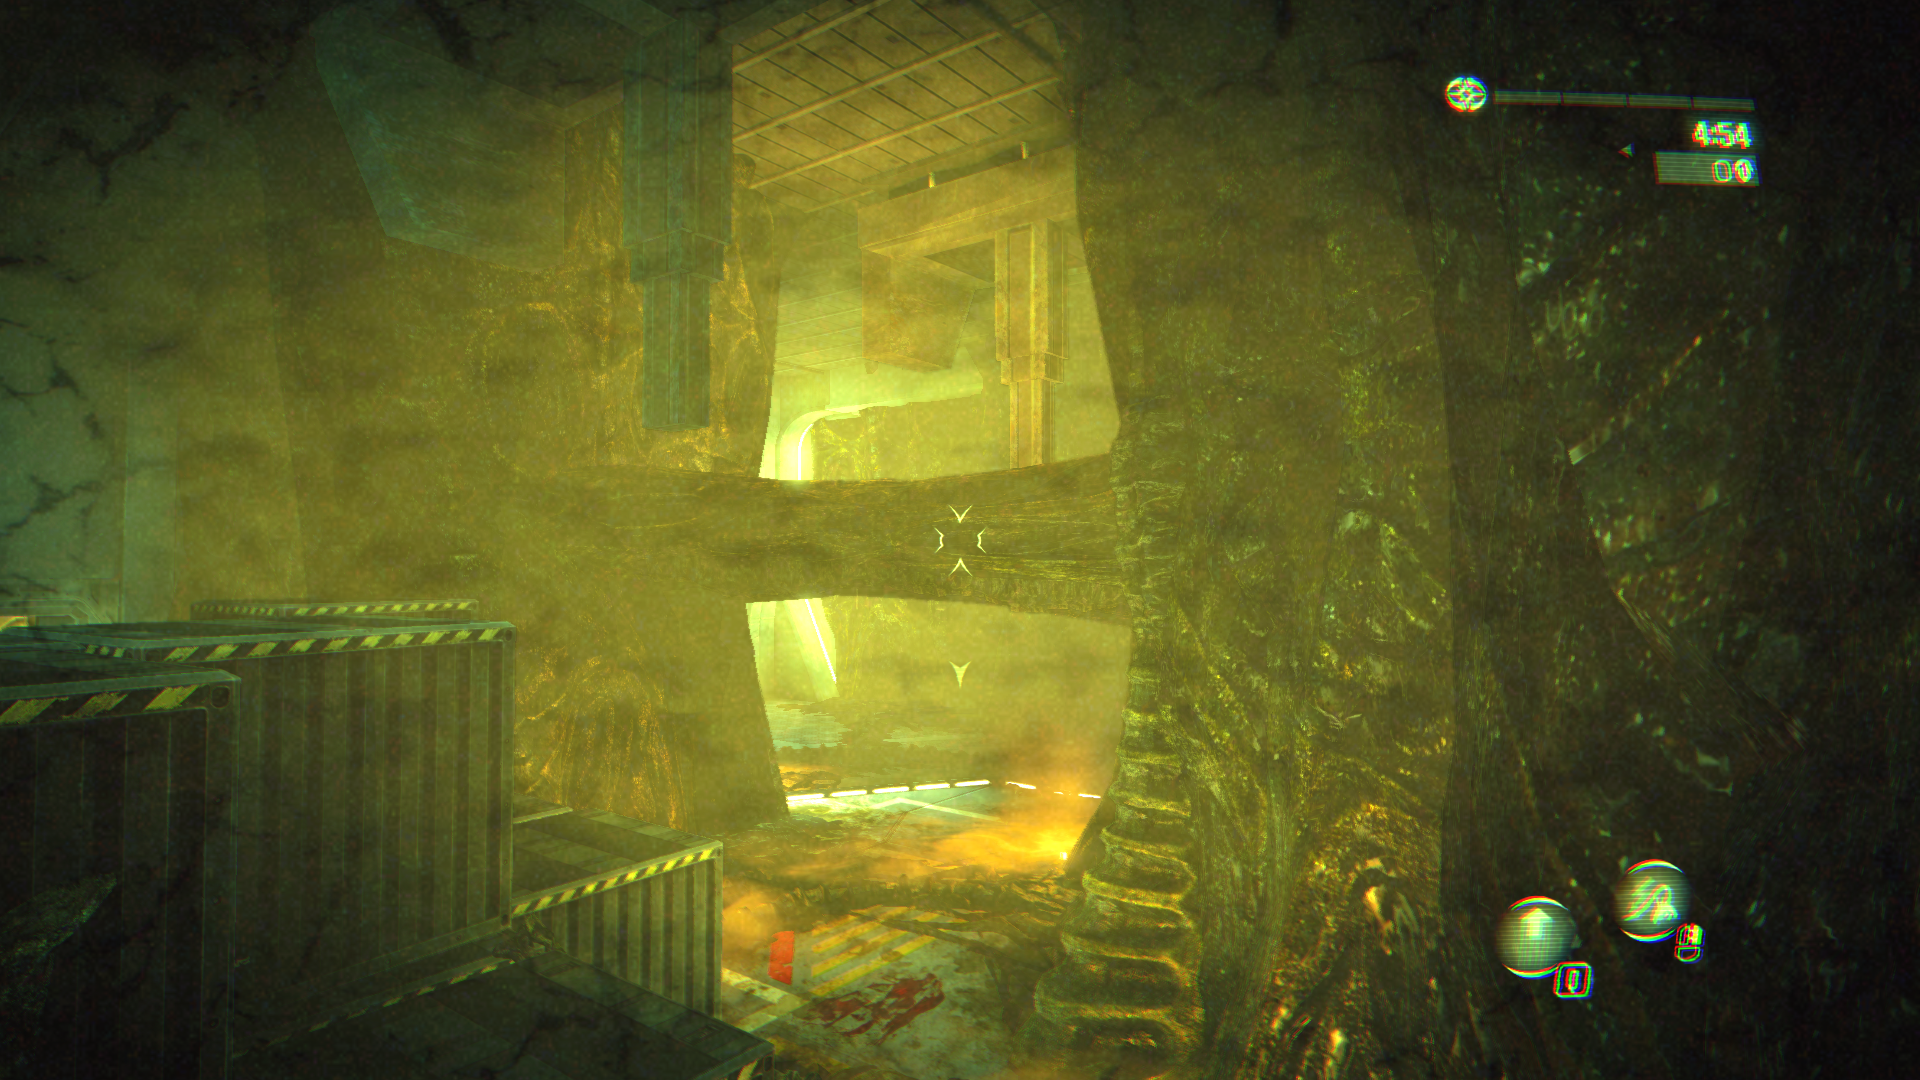
Description: Origin is a standard multiplayer map set around a Weyland-Yutani research facility near the Derelict spacecraft from Alien, located in the broader LV-426 region near Hadley’s Hope. It spans multiple levels and links exterior areas, facility interiors, and Xenomorph-infested caverns. Special weapon pickups include the M5 RPG Launcher, M56 Smart Gun, and the M240 Incinerator Unit. Supported modes: Team Deathmatch, Extermination.
Description: Overrun is a standard multiplayer map set within an LV-426 outpost facility near Hadley’s Hope and is designed exclusively for Survivor. The map emphasizes defensive routing and sustained pressure across interior spaces. Special weapon pickups include the M56 Smart Gun, M240 Incinerator Unit, and the M5 RPG Launcher. Supported mode: Survivor.